Blog

  • How to Maintain a Consistent Blogging Schedule (Even When You’re Busy)

    How to Maintain a Consistent Blogging Schedule (Even When You’re Busy)

    How to Maintain a Consistent Blogging Schedule (Even When You're Busy)

    A busy person happily juggling a laptop, a coffee mug, and a planner, symbolizing effective time management for consistent blogging.
    A busy person happily juggling a laptop, a coffee mug, and a planner, symbolizing effective time management for consistent blogging.

    Photo by Vitaly Gariev on Unsplash

    Starting a blog is filled with excitement, but keeping it alive amid a hectic personal and professional life is another story entirely. Many creators find themselves trapped in a cycle of sporadic posting—publishing three articles in a single week only to disappear for the next two months. Building a successful online presence requires a consistent blogging schedule that fits into your actual lifestyle, rather than an idealized, daily publishing routine that leads straight to burnout. When you establish a rhythm that respects your existing time constraints, you transform blogging from a stressful chore into a manageable, highly rewarding habit.

    Maintaining this momentum does not require you to write for hours every single day. Instead, it relies on systemizing your workflow, understanding your personal capacity, and leveraging smart planning tools. By shifting your approach from reactive writing to proactive content management, you can build an authoritative blog that grows steadily, even if you only have a few hours a week to spare.


    Why a Consistent Blogging Schedule Matters for Growth

    When readers find your blog, they want to know they can rely on you for regular insights. If they see that your last post was published six months ago, they may assume your site is abandoned and look elsewhere for answers. Publishing on a predictable timeline builds audience trust; your readers learn when to expect your newsletters, updates, and articles, turning casual visitors into dedicated followers.

    Consistency also plays a massive role in search engine optimization (SEO). Search engine crawlers prioritize active sites that regularly supply fresh, high-quality content. A predictable publishing cadence makes it easier for search engines to index your site and assess its relevance.

    A visual representation of a search engine crawler robot exploring and indexing a website with a consistent publishing schedule, symbolizing improved SEO.
    A visual representation of a search engine crawler robot exploring and indexing a website with a consistent publishing schedule, symbolizing improved SEO.

    Photo by Stephen Phillips – Hostreviews.co.uk on Unsplash

    Crucially, maintaining a steady pace helps demonstrate experience, expertise, authoritativeness, and trustworthiness. When you reliably produce deep, helpful content written from a place of genuine knowledge, you establish your site as a go-to resource in your niche.


    Finding Your Sustainable Frequency: Weekly, Bi-weekly, or Monthly?

    One of the biggest mistakes new bloggers make is aiming too high right out of the gate. Declaring that you will publish a high-quality article every day while working a full-time job is a fast track to creative exhaustion. To avoid this common burnout trap, you must assess your personal capacity honestly.

    • The Weekly Cadence (1 post per week): This is highly recommended for new bloggers who want to establish a steady rhythm and gain early traction. It keeps your site fresh without requiring an overwhelming daily commitment.
    • The Bi-weekly Cadence (1 post every two weeks): If you write deeply researched, long-form guides, a bi-weekly schedule is often the sweet spot. It gives you plenty of time to research, write, and edit without rushing.
    • The Monthly Cadence (1 post per month): While slower, a monthly schedule can work if your content consists of massive, definitive resources or highly technical case studies.

    The golden rule of blogging is that quality always trumps quantity. It is far better to publish one exceptional, thoroughly researched article every two weeks than three rushed, low-value posts every week. Start small; you can always increase your publishing frequency as you refine your writing systems and free up more time.

    A graphic showing a set of scales, with
    A graphic showing a set of scales, with

    Photo by Nadiia Ganzhyi on Unsplash


    Step-by-Step Guide to Creating a Consistent Blogging Schedule

    Creating a successful workflow requires a transition from spontaneous writing to strategic, structured planning. When you sit down at your desk knowing exactly what you need to write, you eliminate the friction of starting.

    1. Map Out Your Content Pillars

    Before writing a single word, define the core topics your blog will cover. These are your content pillars. Having established pillars ensures that you never run out of ideas and that your content remains highly relevant to your target audience.

    A visual representation of content pillars or a mind map with interconnected topics, defining the core themes of a blog.
    A visual representation of content pillars or a mind map with interconnected topics, defining the core themes of a blog.

    Photo by Miguel Á. Padriñán on Pexels

    2. Research and Validate Ideas in Batches

    Do not search for keyword ideas on the day you plan to write. Set aside a dedicated hour once a month to brainstorm and validate topics. Look at what your audience is asking in online communities, research trending topics in your industry, and look for search terms with reasonable search volume.

    3. Build a Visual Content Calendar

    A visual calendar acts as your map. Whether you use a simple spreadsheet, a physical planner, or a digital project board, having your scheduled topics laid out chronologically keeps you accountable. Align your upcoming posts with seasonal trends, major industry events, or product launches to maximize their impact.

    A digital or physical content calendar showing scheduled blog posts, topics, and publishing dates, acting as a visual roadmap for content creation.
    A digital or physical content calendar showing scheduled blog posts, topics, and publishing dates, acting as a visual roadmap for content creation.

    Photo by Eric Rothermel on Unsplash


    The Pro-Blogger Workflow: Batching and Automation

    If you only write when inspiration strikes, your publishing schedule will inevitably suffer. Professional bloggers rely on systems, not motivation, to get things done. The two most powerful tools at your disposal are batching and automation.

    The Power of Batch Processing

    Batching involves grouping similar tasks together to minimize cognitive fatigue. Writing a blog post requires several distinct phases: research, outlining, drafting, editing, formatting, and graphic creation. Switching back and forth between these tasks is highly inefficient.

    Instead, try dedicating specific blocks of time to just one type of task:

    • Monday: Outline three articles.
    • Wednesday: Draft the content.
    • Saturday: Edit, format, and add images.

    By setting aside dedicated blocks of time for focused work, you can dramatically improve your output. If you are struggling with the actual execution of your drafts, finding ways to consistent blogging schedule and streamline your drafting phases will help you keep your pipeline filled. Speeding up the editing and organizing process ensures you do not get stuck on a single post for weeks.

    [Brainstorm & Outline] ➔ [Batch Draft Content] ➔ [Edit & Format] ➔ [Schedule to Publish] 

    Leveraging Automation and CMS Scheduling

    You do not need to be online at the exact moment your post goes live. Modern content management systems allow you to schedule your content weeks, or even months, in advance.

    A clear workflow diagram illustrating the step-by-step process of content creation: Brainstorm & Outline, Batch Draft Content, Edit & Format, and Schedule to Publish.
    A clear workflow diagram illustrating the step-by-step process of content creation: Brainstorm & Outline, Batch Draft Content, Edit & Format, and Schedule to Publish.

    Photo by Kelly Sikkema on Unsplash

    Once your batched posts are edited and formatted, upload them to your blogging platform and set them to publish automatically at your chosen day and time. Services and tools available on platforms like wp-publisher.com make managing, optimizing, and deploying content incredibly straightforward, allowing you to focus your energy purely on writing.


    Overcoming Common Obstacles to Your Consistent Blogging Schedule

    Even with the best plans, life will occasionally get in the way. Preparing for these hurdles in advance ensures they do not derail your progress completely.

    • Handling Writer's Block: When you sit down to a blank page and do not know what to write, refer back to your pre-planned content calendar and outlines. Having a structured outline with defined subheadings makes drafting feel like filling in the blanks rather than creating something out of nothing.
    • Building a Content Buffer: Aim to have at least two to three posts completely written, formatted, and scheduled in advance. This content buffer acts as a safety net. If you get sick, go on vacation, or have a busy week at your day job, your blog will continue to run seamlessly on autopilot.
    • Simplifying Formatting with Templates: Save time by creating reusable templates for your blog posts. Having standard layouts for tutorials, list articles, and product reviews reduces decision fatigue and keeps your formatting consistent across the site. If you have technical questions about streamlining your site's publishing workflows, exploring a platform's frequently asked questions page can save you hours of trial and error.

    Staying Motivated and Managing Your Schedule as You Scale

    Maintaining a blog is a marathon, not a sprint. To stay motivated over the long haul, it helps to connect with other creators. Engaging with online blogging communities offers peer support, constructive feedback, and invaluable accountability. Sharing your goals with others makes you much more likely to follow through on them.

    Keep a simple progress log. Documenting how many articles you have published, watching your traffic grow, and tracking your search engine rankings provides tangible proof that your hard work is paying off.

    As your blog scales and starts generating revenue, consider transitioning from a solo operation to a collaborative one. You might choose to delegate tasks like graphic design, proofreading, or social media promotion to virtual assistants or freelance specialists, freeing up your time to focus strictly on content strategy and high-level writing.


    Keep Moving Forward

    Establishing a reliable publishing routine does not require you to sacrifice your evenings, weekends, or peace of mind. By setting a realistic publishing frequency, planning your topics in advance, batching your creative tasks, and scheduling your content ahead of time, you can easily balance a successful blog with a busy lifestyle.

    Choose a simple, achievable publishing goal for the upcoming month, outline your first few topics, and start building your momentum today. Consistency is cumulative—every single post you publish builds on the last, gradually paving the way to sustainable online growth.


  • The Ultimate Guide to Efficient Blog Post Research Methods

    The Ultimate Guide to Efficient Blog Post Research Methods

    The Ultimate Guide to Efficient Blog Post Research Methods

    We have all been there: you sit down to write a comprehensive blog post, and within fifteen minutes, your browser is a crowded maze of ten, twenty, or even thirty open tabs. You have academic PDFs, industry reports, competitor articles, and statistical databases all vying for your attention. This phenomenon, often called "tab chaos," quickly leads to cognitive overload and decision paralysis.

    While some niche bloggers report spending up to eight hours researching a single, highly technical blog post, this massive time investment is rarely sustainable or necessary. On the other end of the spectrum, lifestyle, food, and travel writers often eschew heavy desk research entirely, relying on intuition, personal experience, and rapid trend checks to produce highly engaging content.

    The secret to scaling your content production without sacrificing quality lies in developing a structured, time-efficient research workflow. By transforming how you find, evaluate, and organize information, you can slash your preparation time in half and write more authoritative articles.


    Diagnosing "Tab Chaos" and Research Fatigue

    The primary reason blog research takes so long is that most writers research and write simultaneously. When you search for information as you write, you constantly interrupt your creative flow to verify facts, look up definitions, or find supporting statistics.

    This approach leads to several major productivity bottlenecks:

    • Cognitive Overload: Managing 10 to 20 open tabs forces your brain to constantly switch contexts, draining your mental energy before you even write your first paragraph.
    • Person
      Person
    • Information Hoarding: Out of fear of missing a crucial detail, writers often bookmark dozens of pages they will never actually read, stalling progress.
    • Lack of Direction: Without a clear plan, searching the web becomes an aimless journey down endless rabbit holes, turning a quick search into a multi-hour distraction.

    To write efficiently, you must treat research and writing as two entirely separate phases. Once you separate information gathering from content creation, you can streamline your process using a professional publishing workflow. For creators looking to manage their production pipeline seamlessly, utilizing a platform like wp-publisher.com can help bridge the gap between organized research and final publication.

    Workspace clearly divided into a
    Workspace clearly divided into a

    Phase 1: Establish Your Direction Before You Search

    The most efficient way to research is to know exactly what you are looking for before you open a single browser tab. Instead of letting Google dictate the structure of your article, you should establish a clear direction based on your target audience's needs.

    Identify the Core Search Intent

    Before conducting any external research, ask yourself what specific problem your reader is trying to solve. Are they looking for a quick tutorial, a deep-dive conceptual explanation, or practical tips? Aligning your content with this single intent ensures you only collect information that directly serves your reader, allowing you to ignore irrelevant background data.

    Map Out a Preliminary Structure

    Before searching the web, jot down a rough outline of the headings you expect to cover based on your existing knowledge. This preliminary outline acts as your research compass. If you know you need a statistic to support Section A and a real-world example to illustrate Section B, you can search for those specific elements directly, ignoring the temptation to read entire articles from start to finish.

    Using a structured system like the WP Publisher App allows you to organize these initial content ideas and structural headers in a clean, distraction-free environment before you start gathering your sources.


    Phase 2: Targeted Information Gathering

    Once you have your preliminary structure, you can begin gathering your source material. The goal here is speed and precision, keeping your browser clean and your focus sharp.

    Practice Skimming over Reading

    When you open a potential source, do not read it word-for-word. Instead, skim the text by looking at:

    Eye quickly scanning a digital document, highlighting headings and bolded terms.
    Eye quickly scanning a digital document, highlighting headings and bolded terms.
    1. Headings and Subheadings: These tell you if the article covers the specific points in your outline.
    2. Bolded Terms and Bullet Points: Authors highlight their most important takeaways here.
    3. Introductions and Conclusions: These sections usually summarize the main arguments, saving you from reading the entire body copy if the source is not a perfect fit.

    Keep a Low Tab Profile

    To maintain mental clarity, try to keep your active browser tabs to a minimum. Only keep tabs open if you are actively extracting information from them. The moment you find the statistic, quote, or fact you need, copy it into your research document along with the source URL, and close the tab immediately. This prevent "tab hoarding" and keeps your desktop organized.


    Phase 3: Synthesizing and Organizing Your Research

    Once you have collected your raw data, statistics, and expert quotes, you must synthesize this information into a cohesive outline.

    Scattered research notes, links, and data being organized into a cohesive structure.
    Scattered research notes, links, and data being organized into a cohesive structure.

    Centralize Your Notes

    Never leave your research scattered across bookmarks or open browser windows. Instead, paste all your notes, links, and thoughts into a single master document. Group your findings under the specific headings you planned during Phase 1. This turns the drafting process into a simple "fill-in-the-blank" exercise. You can read more About how modern digital publishers structure their content pipelines to maintain efficiency and consistency across multiple articles.

    Handle Contradictory Claims Transparently

    It is common to find conflicting statistics or opposing viewpoints during your research. Rather than ignoring these contradictions or spending hours trying to prove which one is universally correct, address them openly in your post.

    If two reputable industry studies offer differing statistics, briefly present both perspectives and link directly to the source with the stronger methodology. This transparency not only saves you research time but also builds trust with your readers by demonstrating that you have thoroughly evaluated the topic.


    Niche Adaptations: Tailoring Your Research Workflow

    Research requirements vary wildly depending on your blog's industry. Tailoring your depth of research to your specific niche is key to maintaining a highly productive schedule.

    Experiential and Creative Blogs

    For lifestyle, travel, fashion, or food blogs, intensive external research is rarely necessary and can actually dilute your unique voice. Readers visit these blogs for personal experiences, unique recipes, and practical advice. For these niches, limit your research to quick keyword checks to see what terms your audience uses, and focus the rest of your energy on original photography, personal storytelling, and clear, step-by-step instructions.

    Technical and Highly Regulated Blogs

    If you write about finance, medicine, psychology, or software engineering, your research must be rigorous and accurate. However, you can still remain highly efficient by focusing primarily on primary sources, such as peer-reviewed journals, official government databases, and whitepapers. Avoid relying on third-party blog summaries, which often misinterpret data and force you to spend extra time double-checking their work. Go straight to the source, copy the core data, and translate it into clear terms for your readers.


    Transitioning from Research to Writing

    The final step in an efficient research methodology is knowing when to stop. Research is a form of productive procrastination; it is easy to convince yourself that you need "just one more source" before you can start writing.

    Person closing browser tabs, preparing to start writing in a new document.
    Person closing browser tabs, preparing to start writing in a new document.

    Set a firm time limit for your research phase. Once your time is up, close your browser entirely, open your master document containing your organized notes, and begin writing. By drafting your post using only your compiled notes rather than constantly toggling back to active web pages, you will write faster, maintain a consistent voice, and avoid accidental plagiarism.


  • Choosing the Best WordPress AI Writing Assistant Plugin: A Complete Guide

    Choosing the Best WordPress AI Writing Assistant Plugin: A Complete Guide

    Choosing the Best WordPress AI Writing Assistant Plugin: A Complete Guide

    The demands on modern content creators, bloggers, and web developers are higher than ever. To maintain a competitive edge, publishing consistent, high-quality content is no longer optional—it is a baseline requirement. However, the traditional writing process, which involves bouncing between external drafting apps, spelling checkers, research tabs, and your content management system, can severely fragment your workflow.

    This is where a dedicated WordPress AI writing assistant plugin changes the game. By embedding artificial intelligence directly into your WordPress dashboard, these plugins bridge the gap between ideation and publication. Instead of relying on bulk, generic text generators that produce robotic articles, modern AI assistants work alongside you inside your editor, helping you refine your prose, design clean layouts, and optimize your writing in real time.


    What is a WordPress AI Writing Assistant Plugin and How Does It Work?

    A WordPress AI writing assistant plugin is a software extension that integrates directly with your website's editor—primarily the Gutenberg block editor, but often extending to other editing environments. Unlike standalone software-as-a-service (SaaS) copywriting tools that require you to copy and paste text back and forth, these plugins live where your content is born.

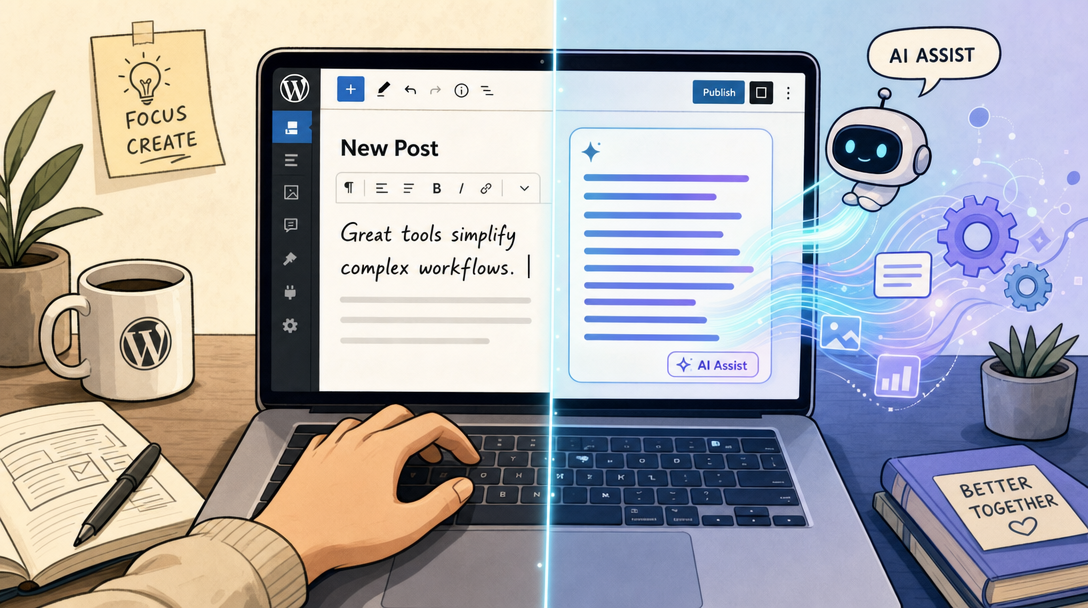
    AI assistant helps a writer create content within the WordPress editor.
    AI assistant helps a writer create content within the WordPress editor.

    Seamless Dashboard Integration

    When you install an AI assistant, it becomes a native part of your writing environment. If you use the standard Gutenberg editor, the AI assistant usually manifests as a block type or an inline contextual menu. As you highlight a sentence or insert a new block, you can prompt the AI to expand your thoughts, simplify complex vocabulary, translate text, or adjust your tone.

    This native positioning minimizes context switching. You no longer have to leave your tab to verify grammar, rewrite a clumsy sentence, or generate a structured list. Everything happens natively, allowing you to maintain your creative momentum. For creators looking to optimize their overall publishing workflow, leveraging platforms like wp-publisher.com can make content distribution seamless.

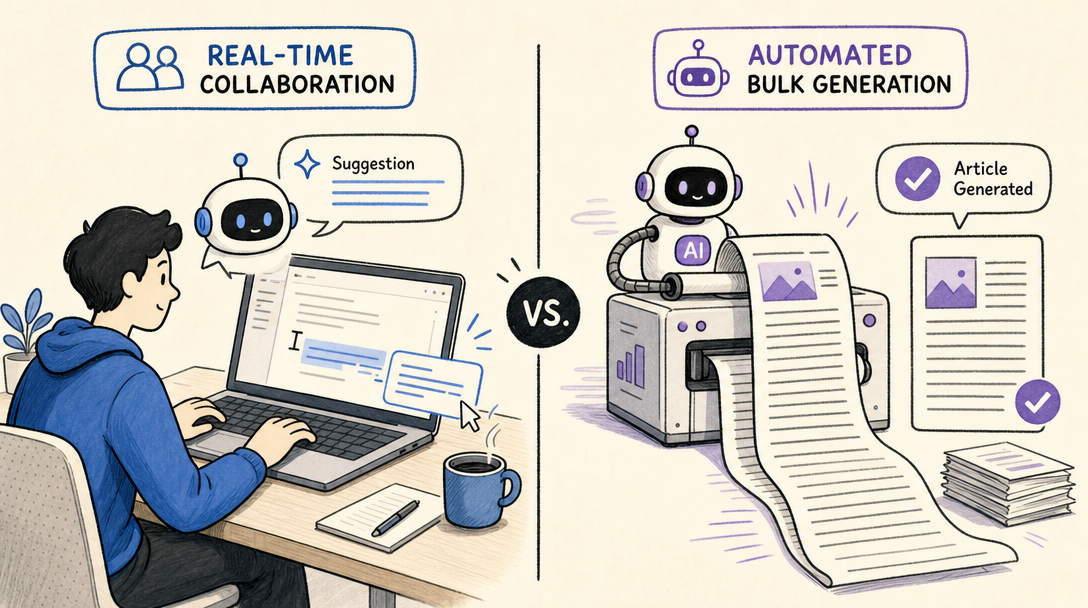
    Interactive "As-You-Write" Assistance vs. Bulk Generation

    It is important to understand the structural difference between an interactive AI assistant and a bulk article generator:

    Interactive AI writing and bulk AI content generation shown side-by-side.
    Interactive AI writing and bulk AI content generation shown side-by-side.
    • Bulk Generators: These tools typically require a single prompt or keyword and spit out a fully formed, multi-paragraph article. While fast, the output often lacks a cohesive human voice, requires heavy editing, and risks feeling detached or repetitive.
    • Interactive Writing Assistants: These plugins act as digital co-writers. They listen to your inputs block-by-block. If you are struggling with a transition paragraph, the assistant can suggest the next logical sentence. If a paragraph is too dense, it can rewrite it for better readability. They are designed to support and elevate your unique perspective rather than replace it entirely.

    Top WordPress AI Writing Assistant Plugins Compared

    The ecosystem of AI plugins is expanding rapidly, with different developers taking unique approaches to integration, cost control, and model support. Understanding the strengths of the leading options can help you select the tool that best fits your creative process.

    Jetpack AI Assistant

    Jetpack is one of the most widely used plugin suites in the WordPress ecosystem, and its native AI Assistant brings powerful text and formatting capabilities directly into the Gutenberg block editor.

    Because Jetpack is deeply integrated with the core block system, its assistant is exceptionally good at structural tasks. It does not just write paragraphs; it can build structured data tables, create custom forms, and generate relevant post images on the fly. This makes it a highly visual assistant that helps you build rich media posts without needing external graphic design or data formatting tools.

    WP Wand

    For creators who want ultimate control over the underlying artificial intelligence models powering their site, WP Wand offers a highly flexible approach. Instead of tying you to a single proprietary system, WP Wand allows users to connect their own API keys from top-tier AI providers.

    This plugin supports connections to OpenAI, Anthropic (Claude), OpenRouter, and DeepSeek. By inputting your personal developer key, you bypass the marked-up subscriptions of typical SaaS tools and pay the raw processing costs directly to the AI providers. It also features robust translation options and prompt frameworks designed to guide your writing seamlessly from draft to polished piece.

    Key Features and Models At a Glance

    To make the differences clearer, let us compare how these leading approaches stack up in terms of integration, model flexibility, and overall strengths:

    Plugin Name Primary Editor Integration Supported AI Models Key Strengths Pricing Structure
    Jetpack AI Assistant Native Gutenberg Blocks Proprietary & Partner Models Seamless block formatting (tables, forms, images) Free tier / Paid plans from $4.95/month
    WP Wand WordPress block editor OpenAI, Claude, OpenRouter, DeepSeek Multi-model API flexibility, extreme cost control Freemium (Use your own API keys)
    Generic API Connectors Gutenberg & Classic Editor OpenAI / Custom endpoints Direct LLM communication, zero subscription fees Pay-per-use via developer accounts

    API-Based Plugins vs. SaaS Subscriptions: A Cost Analysis

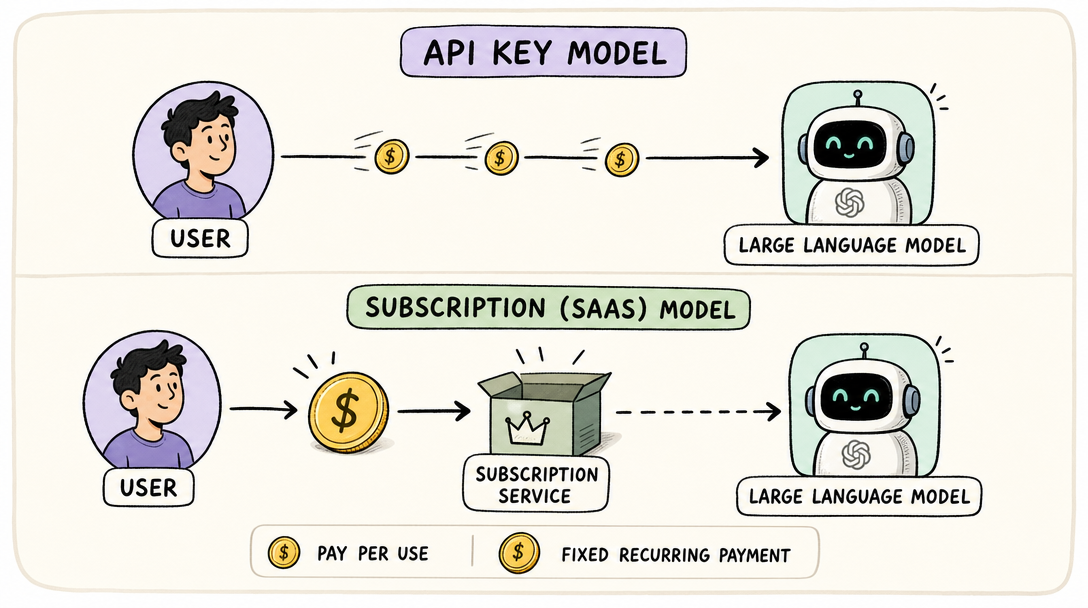
    One of the most important decisions you will make when choosing a WordPress AI writing assistant plugin is how you pay for the underlying artificial intelligence. The market is split into two primary business models: traditional SaaS subscriptions and direct API integrations.

    Two payment models for AI plugins: direct API versus monthly subscription.
    Two payment models for AI plugins: direct API versus monthly subscription.

    The SaaS Subscription Model

    Under a subscription model, you pay a flat monthly or annual fee directly to the plugin developer or an external service. For example, Jetpack AI Assistant offers a promotional tier starting at $4.95 per month, which eventually transitions to standard renewal pricing.

    The primary benefit of this model is simplicity. You do not have to set up developer accounts, manage billing keys, or worry about fluctuating costs based on your monthly word count. You pay a predictable fee and get a set amount of usage, making it ideal for casual bloggers or small business owners who value convenience above all else.

    The Direct API Key Model

    For high-volume publishers, agencies, and web developers, the direct API key model is highly efficient. Plugins like WP Wand let you generate your own API credentials directly from providers like OpenAI or Anthropic and paste them into your plugin settings.

    When you write using your own API key, you bypass the middleman. Instead of paying a flat $50 per month to an external writing platform, you pay fractions of a cent per word directly to the AI provider. Under this pay-as-you-go structure, drafting a comprehensive, well-structured article often costs just a few cents in raw API usage. If you are unsure about how AI credits or API keys translate to your dashboard, reviewing a comprehensive frequently asked questions page can clarify how these integrations operate.


    How to Use an AI Assistant to Improve Post Readability and Formatting

    Creating content that ranks well and keeps visitors on your page requires more than just correct spelling. Your posts must be highly readable, logically structured, and engaging. A quality AI assistant serves as a direct editorial coach to help you reach these benchmarks.

    Improving Sentence Structure and Readability

    Long, run-on sentences and dense academic jargon can cause readers to click away from your site. An inline AI assistant can instantly scan your text to identify readability bottlenecks.

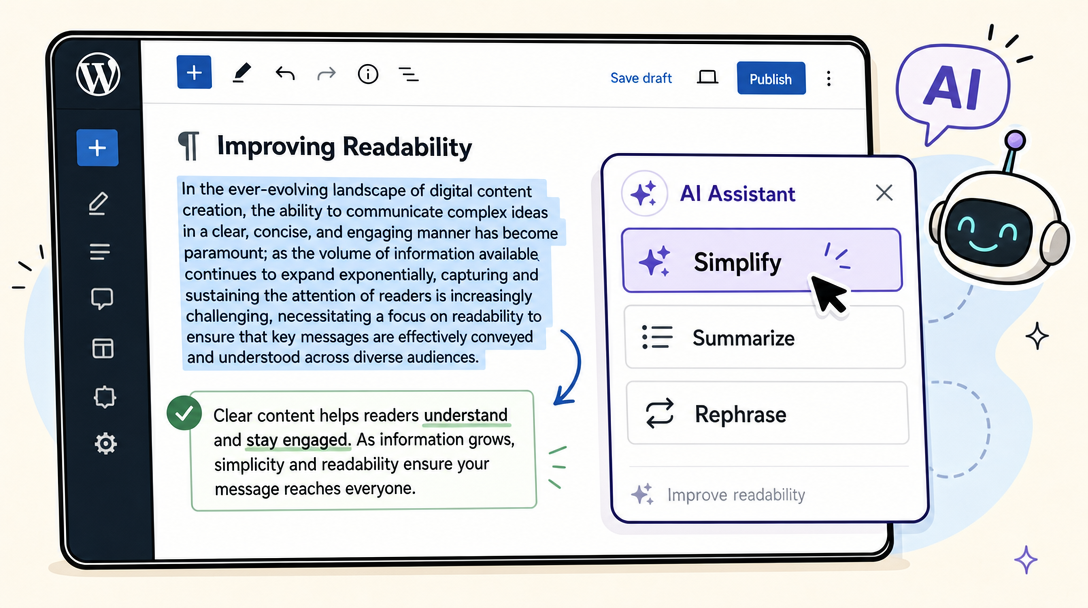
    By highlighting a complex passage, you can instruct the assistant to "simplify" or "summarize." The AI will break up long sentences, substitute passive voice with active verbs, and suggest bullet points to make the information highly digestible. This immediate feedback loop helps you maintain a high readability score throughout your writing process.

    AI assistant simplifies highlighted text within a WordPress editor screen.
    AI assistant simplifies highlighted text within a WordPress editor screen.

    Generating Structural and Media Elements

    Great blog posts are not just walls of text; they use visual cues to guide the reader's eye. Advanced assistants can handle these layout challenges natively:

    • Structured Tables: If you are listing product specifications, pricing tiers, or comparison metrics, you can ask the assistant to format that data into a clean, responsive table.
    • Pre-filled Forms: For lead generation or reader feedback, some advanced tools can generate functional form blocks tailored to the context of your post.
    • Post Images: Visual search is crucial. Integrated AI image generators can construct relevant visual elements that match the tone and topic of your written content, keeping users on your page longer.

    Best Practices for Writing Safely with AI in WordPress

    As helpful as AI writing assistants are, relying too heavily on automated generation carries distinct risks. To ensure your website maintains its search engine visibility and builds long-term trust with your audience, you must follow a balanced, responsible approach to AI integration.

    Human writer diligently edits and fact-checks AI-generated content.
    Human writer diligently edits and fact-checks AI-generated content.

    Keep a "Human-in-the-Loop"

    The single most important rule of working with artificial intelligence is to never publish raw, unedited AI content. Your audience visits your site for your unique insights, personal experiences, and distinct perspective.

    Use your WordPress AI writing assistant plugin to handle the heavy lifting of drafting, researching, structuring, and brainstorming. Once the initial draft is complete, step in as the primary editor. Inject your personal anecdotes, verify the tone, and ensure that the finished piece reads like it was written by a real human expert. Many developers prefer managing their publishing schedules on a dedicated publishing application to ensure cross-platform consistency.

    Rigorous Fact-Checking

    Large language models do not "know" facts; they predict the next most logical word based on patterns in their training data. This means they are prone to "hallucinations"—confidently stating incorrect dates, historical facts, scientific statistics, or technical instructions.

    Before hitting publish, verify every statistic, claim, and source link generated by your AI tool. A single unverified claim can damage your brand's authority and alienate your readership.

    Respecting Data Privacy and Security

    When you use an AI plugin, your draft content is sent to third-party servers (like OpenAI or Anthropic) for processing. If you are drafting highly sensitive business reports, proprietary product announcements, or personal client details, review the data usage policies of both your plugin and your API provider. Ensure that your inputs are not being utilized to train public machine learning models without your explicit consent.


    Elevating Your Content Strategy

    Integrating a WordPress AI writing assistant plugin into your website is one of the most effective ways to scale your content output without sacrificing quality. Whether you choose a native, all-in-one system like Jetpack AI to format beautiful blocks, or opt for an open-ended API tool like WP Wand to keep your operational costs low, these assistants act as valuable partners in the creative process.

    By combining the structural efficiency of artificial intelligence with your personal expertise, research, and unique editorial voice, you can produce highly readable, deeply engaging content that resonates with readers and stands out across the web.

    Related reading

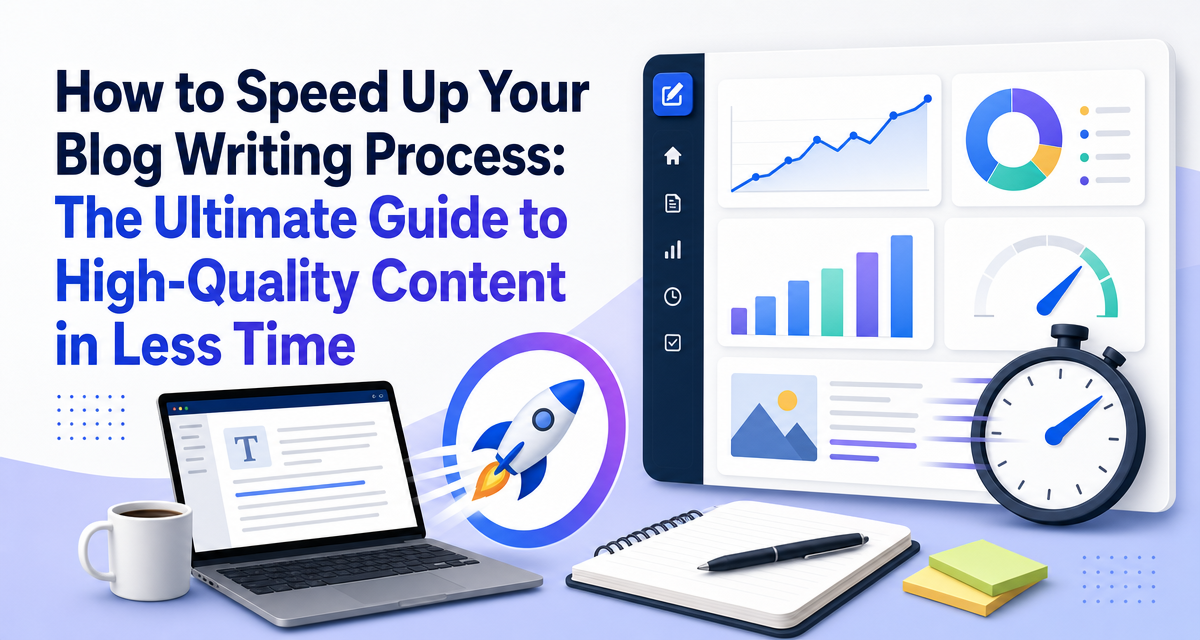
  • How to Speed Up Your Blog Writing Process: The Ultimate Guide to High-Quality Content in Less Time

    How to Speed Up Your Blog Writing Process: The Ultimate Guide to High-Quality Content in Less Time

    How to Speed Up Your Blog Writing Process: The Ultimate Guide to High-Quality Content in Less Time

    Staring at a blank white screen while a cursor blinks mockingly is a rite of passage for almost every content creator. You know what you want to say, but the journey from a vague mental concept to a polished, published blog post often feels like an uphill battle. It is easy to spend five, six, or even eight hours agonizing over a single article, only to feel exhausted and behind schedule.

    A person with a look of mild frustration sits at a desk, staring at a blank computer screen with a prominent, blinking cursor.
    A person with a look of mild frustration sits at a desk, staring at a blank computer screen with a prominent, blinking cursor.

    But producing great content does not have to be a slow, painful crawl. Speeding up your writing process is not about cutting corners, lowering your editorial standards, or typing at a frantic pace. Instead, it is about designing a highly efficient system that removes friction, eliminates decision fatigue, and lets your thoughts flow naturally.

    By restructuring your workflow, utilizing modern tools, and adopting a systematic approach, you can dramatically reduce the time spent on every article while maintaining—or even improving—the quality of your output.


    The Core Philosophy: Separating Creation from Editing

    The single biggest obstacle to writing speed is trying to write and edit at the exact same time. When you pause after every sentence to fix a typo, search for a better synonym, or reorganize a paragraph, you constantly disrupt your mental momentum.

    Think of your brain as having two entirely distinct modes: the creator and the editor.

    An illustration depicting two distinct figures: one, a creative, energetic
    An illustration depicting two distinct figures: one, a creative, energetic
    • The Creator is intuitive, fast-paced, and focused on generating ideas, finding connections, and getting concepts down on paper.
    • The Editor is analytical, structured, and focused on polishing, formatting, grammar, and style.

    When you try to run both modes simultaneously, they clash. You write a sentence, your inner editor criticizes it, you delete it, and you are right back where you started. To speed up your blog writing process, you must completely separate these two phases.

    During your drafting phase, commit to writing continuously without looking back. If you make a spelling mistake, leave it. If you realize a paragraph could be structured better, make a quick note to fix it later and keep moving forward. By giving yourself permission to write a messy first draft, you unlock a state of flow that allows words to hit the page much faster.


    Step-by-Step Blueprint to Accelerate Your Writing Workflow

    To turn content creation into an efficient system, you should break the process down into discrete steps. When you sit down with a clear roadmap, you never have to wonder what to do next.

    1. Maintain a Rolling Idea Bank

    Never sit down to write without knowing what you are going to write about. Deciding on a topic on the fly is a major source of writer's block. Instead, maintain a dedicated digital document, spreadsheet, or notes app to serve as your idea bank. Whenever inspiration strikes—whether you are reading an article, listening to a podcast, or talking to a client—add it to the list. When it is time to write, simply choose a pre-approved topic from your bank and start immediately.

    2. Build a Detailed Outline Before Writing

    An outline is the architectural blueprint of your article. Writing without an outline is like trying to build a house without a plan; you will likely get lost, lose focus, and waste hours backtracking.

    An architectural blueprint is superimposed over a building under construction, with drafting tools nearby, symbolizing an article
    An architectural blueprint is superimposed over a building under construction, with drafting tools nearby, symbolizing an article

    Before drafting, spend 10 to 15 minutes mapped out your main headers (H2s and H3s) and adding a few bullet points under each. This breaks a daunting word-count goal into tiny, highly manageable sub-sections. When you start drafting, you only have to focus on writing one small section at a time.

    3. Write the Body Paragraphs First

    Many writers get stuck on the introduction. They spend an hour trying to craft the perfect hook before they have even written the meat of the article.

    You can bypass this bottleneck entirely by writing your body sections first. It is much easier to write an engaging introduction and a strong conclusion once you know exactly where the article ended up and what points were made.

    4. Craft Your Hook and Conclusion Last

    Once your body paragraphs are fully drafted, you will have a clear picture of the article’s tone, scope, and key takeaways. At this point, writing a compelling introduction and a concise conclusion becomes an effortless task. You can quickly summarize your main points and draft a call to action that aligns perfectly with the content you just created.


    Workflow Comparison: Traditional vs. Accelerated Method

    To understand where your time is actually spent, it is helpful to look at how a structured, accelerated workflow compares to a traditional, unoptimized approach.

    Workflow Stage Traditional Approach Accelerated Approach Practical Impact
    Topic Selection Brainstorming on the spot; staring at a blank page. Selecting a pre-validated topic from a rolling idea bank. Eliminates initial procrastination and decision fatigue.
    Preparation Writing immediately with no outline; researching while writing. Building a detailed outline with H2/H3 subheadings first. Prevents getting lost in research rabbit holes or losing track of the main point.
    Drafting Phase Writing, editing, and correcting grammar concurrently. Continuous drafting without pausing; ignoring typos. Encourages flow state and drastically increases output speed.
    Structuring Writing the introduction first and struggling with the hook. Writing the body first; crafting the introduction and conclusion last. Avoids introductory blockages and ensures a highly cohesive article.
    Formatting & Editing Editing paragraph by paragraph during drafting. Batching all proofreading, formatting, and link placement at the end. Ensures professional polish without disrupting creative momentum.

    Practical Strategies to Boost Daily Writing Output

    Once you have restructured your workflow, you can implement specific daily strategies to further increase your typing and composition speed.

    Use Focus Sprints and Time-Blocking

    Multitasking is a massive productivity killer. When you have email notifications popping up, social media tabs open, or your phone vibrating next to you, your focus is fragmented. Use time-blocking to dedicate specific, uninterrupted windows to your writing.

    Try working in focused sprints, such as 25-minute blocks of intense, distraction-free writing, followed by a short break. During these sprints, close all unrelated browser tabs, silence your phone, and focus entirely on putting words on the page.

    A person is intensely focused on typing at a desk, surrounded by a clear bubble that blocks out blurred distractions, with a timer nearby.
    A person is intensely focused on typing at a desk, surrounded by a clear bubble that blocks out blurred distractions, with a timer nearby.

    Utilize Frameworks and Templates

    Most blog posts fall into a few common structural formats: listicles, how-to guides, comparison articles, or product reviews. Instead of reinventing the wheel every time you start a new piece, create standard structural templates for these formats.

    For instance, a standard how-to guide template might look like this:

    • Hook: Identify the user’s problem.
    • Promise: Explain how this guide will solve it.
    • Step-by-Step Breakdown: Logical, chronological subheadings.
    • Common Mistakes: What to avoid.
    • Conclusion: A clear call to action.

    Having these structures ready allows you to instantly plug in your research and focus solely on the writing.

    Leverage Dictation and Voice Typing

    Most people speak significantly faster than they type. If you find yourself struggling to keep up with your thoughts, try using speech-to-text dictation tools. You can speak naturally to draft your paragraphs, then go back during the editing phase to clean up the formatting, punctuation, and grammar. This approach is highly effective for capturing a conversational, natural tone.

    A person speaks into a modern microphone, and words instantly appear on a digital screen, illustrating the speed of dictation.
    A person speaks into a modern microphone, and words instantly appear on a digital screen, illustrating the speed of dictation.

    Leveraging Technology to Streamline Publishing

    Speeding up your writing process is not just about the actual writing; it also involves streamlining the post-draft activities like formatting, styling, and publishing. Many content creators waste hours importing drafts into their content management systems, manually styling headers, and wrestling with image placements.

    Using specialized writing tools and platforms can dramatically ease this transition. For example, utilizing advanced blogging ecosystems like wp-publisher.com helps creators bridge the gap between drafting and live publishing. By utilizing the writing dashboard in the specialized App, you can manage your formatting and media assets in a unified space, avoiding the clunky, repetitive copy-pasting that slows down traditional workflows.

    To understand how optimization fits into a broader publishing strategy, visiting our About page can provide deeper insights into our team's commitment to clean, efficient publishing design. Organizing your tech stack properly ensures that once your draft is complete, pushing it live takes minutes rather than hours.


    Overcoming Common Bottlenecks in Speed Writing

    Even with the best systems in place, certain hurdles can still slow you down. Knowing how to navigate these roadblocks is key to keeping your momentum.

    • The Research Trap: It is incredibly easy to get sidetracked by endless research. To avoid this, set a hard time limit for your research phase before you start writing. If you realize you need a specific statistic or quote while drafting, do not stop to search for it. Simply write a placeholder like [Insert statistic about conversion rates here] and keep writing. You can find and insert those specific details during your editing pass.
    • Perfectionism: Remember that a published, helpful article is infinitely better than a perfect draft that never leaves your computer. Your goal is to provide clear value to your reader. Minor stylistic imperfections will not ruin your content, but failing to publish certainly will.
    • Overcomplicating the Vocabulary: Write the way you speak. You do not need to use complex jargon or overly formal language to sound authoritative. Conversational, clear, and direct language is much easier to read, highly engaging for your audience, and significantly faster to write.

    Related reading

  • The Ultimate WP Publishing Checklist for Flawless Content Every Time

    The Ultimate WP Publishing Checklist for Flawless Content Every Time

    The Ultimate WP Publishing Checklist for Flawless Content Every Time

    An illustration depicting a comprehensive WordPress publishing checklist with items related to quality, SEO, and formatting.
    An illustration depicting a comprehensive WordPress publishing checklist with items related to quality, SEO, and formatting.

    Photo by Souvik Banerjee on Unsplash

    Creating high-quality content is only half the battle of running a successful website. Ensuring that your layout is clean, your search engine optimization (SEO) is dialed in, and your formatting is absolutely flawless requires a systematic approach. Without a structured wp publishing checklist, even the most experienced editorial teams can overlook small mistakes that impact reader engagement and search rankings. From broken links and messy typography to missing image descriptions, a single oversight can undermine your hard work.

    In a fast-paced digital landscape, consistency is key to building authority and keeping readers on your site. Establishing a standardized workflow allows you to transition seamlessly from a raw draft to a polished, professional piece of digital media. By auditing your layout, technical components, and metadata before clicking the publish button, you protect your brand image and ensure a premium user experience.


    Why Your Website Needs a Standardized WP Publishing Checklist

    When multiple authors, editors, and contributors collaborate on a single platform, keeping a cohesive editorial standard can be extremely challenging. Even if you are a solo blogger, human error is inevitable when you rely solely on memory. A systematic approach to publishing acts as a final quality control layer, ensuring that every article meets your site’s rigorous requirements.

    Implementing a uniform process reduces the friction of content production. Instead of second-guessing whether you have completed every optimization step, you can systematically work through a clear set of guidelines. To explore more resources and editorial strategies designed for modern creators, you can visit wp-publisher.com to discover tools that elevate your content strategy.

    A standardized process also ensures that your search engine optimization remains uniform across hundreds of posts. SEO is not a one-time setup; it is a continuous practice of maintaining clean code, descriptive URLs, logical header structures, and optimized images. When these factors are managed systematically, search engines can crawl, index, and rank your content far more effectively.


    The Ultimate WP Publishing Checklist: A Step-by-Step Blueprint

    A visual blueprint or diagram illustrating a smooth, step-by-step publishing workflow for WordPress content.
    A visual blueprint or diagram illustrating a smooth, step-by-step publishing workflow for WordPress content.

    Photo by Ferenc Almasi on Unsplash

    To make your publishing workflow as smooth as possible, we have broken down the process into five core areas. By addressing these steps in order, you can catch formatting anomalies and technical issues before they ever reach your audience.

    1. Typography, Formatting, and Code Clean-up

    A visual representation of clean typography, correctly formatted headings (H1, H2, H3), and clutter-free code within a content editor.
    A visual representation of clean typography, correctly formatted headings (H1, H2, H3), and clutter-free code within a content editor.

    Photo by Ferenc Almasi on Unsplash

    Many content creators write their drafts in external word processors such as Google Docs or Microsoft Word before moving them over to the block editor. While these programs are excellent for drafting and collaborating, copying and pasting text directly into your website can sometimes import hidden code, unnecessary styling tags, or formatting irregularities.

    • Pasting Safely: Use plain text pasting options or clear the formatting of pasted text to ensure no external stylesheet instructions interfere with your site’s native design.
    • Checking Paragraph Lengths: Keep your paragraphs short (typically two to four sentences) to maximize readability on mobile devices.
    • Logical Heading Flow: Ensure your headings follow a strict, logical hierarchy. Never skip heading levels (for instance, do not jump directly from an H2 to an H4), and verify that there is only one main title (H1) per page.

    2. URL and Permalink Optimization

    The permalink, or URL slug, is one of the first elements search engines and readers look at to understand what your page is about. Leaving your URL as a generic string of numbers or a direct copy of a long headline is a missed opportunity for optimization.

    • Descriptive Slugs: Keep slugs short, descriptive, and directly related to your primary topic.
    • Proper Formatting: Use lower-case letters and separate words strictly with hyphens. Avoid special characters or punctuation marks that could break link sharing.
    • Future-Proofing: Avoid putting specific dates or years in your URL unless absolutely necessary. This allows you to update the content in the future without changing the link structure and losing established search equity.

    3. Media Optimization and Accessibility

    An image showing a compressed image file next to text explaining alt attributes and descriptive file naming, emphasizing web accessibility.
    An image showing a compressed image file next to text explaining alt attributes and descriptive file naming, emphasizing web accessibility.

    Photo by Lukas Müller on Unsplash

    Images and visual aids keep readers engaged, but they can also slow down your site if they are not formatted correctly. Furthermore, making sure your media is accessible to all users is a fundamental part of modern web standards.

    • Image Compression: Compress all images before uploading them to prevent slow page load speeds, which can negatively impact both user experience and search rankings.
    • Descriptive Alt Text: Add clear, descriptive alternative (alt) text to every image. Alt text helps visually impaired readers using screen readers understand your visuals and provides search engines with context.
    • Proper File Names: Rename your image files using descriptive, hyphen-separated keywords instead of generic names like "image_01.png."

    4. Taxonomy and Categorization

    Proper site architecture relies heavily on how you organize your content. Categories and tags help users navigate your site and help search engines understand the relationships between different pieces of content.

    • Assigning Categories: Place your post into one primary category that accurately reflects its overarching theme.
    • Strategic Tagging: Use a few relevant tags to connect the post to specific sub-topics without over-cluttering your site taxonomy.
    • Checking the Excerpt: Write a concise, engaging summary in the excerpt field. This text often appears on your archive pages and can be used by search engines to summarize your page.

    5. Link Hygiene and External Destinations

    Internal and external links are crucial for providing additional context and building domain authority. However, broken links or poorly configured destinations can harm your credibility.

    • Internal Linking: Link to at least two or three other relevant articles on your own site to keep readers exploring your content.
    • Link Verification: Click on every link in your preview window to confirm they open the correct pages.
    • Opening Behavior: Set external links to open in a new tab so users do not completely leave your website when clicking on a reference.

    How to Automate Your WP Publishing Checklist with Editorial Tools

    A graphic depicting automated tools or a plugin interface streamlining a WordPress publishing checklist, showing efficiency and a robot or gear icon.
    A graphic depicting automated tools or a plugin interface streamlining a WordPress publishing checklist, showing efficiency and a robot or gear icon.

    Photo by Jotform on Unsplash

    While keeping a mental or paper-based list is a great start, relying entirely on memory can fall short during busy editorial cycles. This is why many professional newsrooms and content teams utilize technical solutions to enforce their editorial workflows. By utilizing specific plugins, you can programmatically prevent a post from being published if it does not meet your site's strict criteria.

    For example, specialized administrative tools can allow you to set minimum or maximum limits on word counts, enforce the use of categories, or require a specific number of tags. If a draft fails to meet these parameters, the system can restrict publishing privileges until the writer makes the necessary adjustments.

    To see how technology can assist you in streamlining this process, check out the specialized App developed to simplify publishing workflows. Using digital helpers removes the guesswork from editing, giving your team absolute peace of mind before every launch. If you have questions about setting up these configurations, you can explore the helpful Faq section for common troubleshooting tips.

    Publishing Workflow Element Manual Verification Automated Checklist System
    Taxonomy Rules Editors must visually check if categories and tags are assigned correctly. Automatically blocks publishing if category is missing or tag count exceeds limits.
    Length & Word Counts Writers must manually check the editor status bar for length and word count. Enforces strict minimum and maximum word count parameters before publication.
    Alt Text Verification Editors must click on every image to check for alternative text. Scans media block parameters and flags any missing descriptive text instantly.
    Process Efficiency High risk of oversight, especially when rushing to meet tight editorial deadlines. Standardizes the editorial gatekeeping process, eliminating human oversight errors.

    Printable Formatting and Checklist Template

    A clear photo of a printed checklist template on a desk, with checkboxes, ready for manual review before publishing content.
    A clear photo of a printed checklist template on a desk, with checkboxes, ready for manual review before publishing content.

    Photo by Markus Winkler on Unsplash

    If you prefer to have a tangible, easy-to-use guide next to you while editing, you can copy, paste, or print this simplified checklist. Use it as a final review protocol before making any post live to the public.

    Quick-Reference Pre-Publish Checklist

    • Headline: Is the title engaging, clear, and formatted as the only H1 tag on the page?
    • Heading Hierarchy: Do the subheadings follow a logical progression (H2 to H3 to H4)?
    • Paragraph Structure: Are text blocks broken up into readable chunks of 2-4 sentences?
    • Code Cleanliness: Has the text been pasted cleanly without importing bloated span tags or external inline styles?
    • URL Slug: Is the permalink short, lower-case, descriptive, and separated by hyphens?
    • Image Compression: Are all image files optimized and compressed for quick loading times?
    • Alt Text: Does every image have a helpful, descriptive alternative text attribute for accessibility?
    • Internal Links: Are there natural links pointing back to other helpful pages on your website?
    • External Links: Do external links open in a new tab so you do not lose your visitor's attention?
    • Taxonomy: Is the post assigned to one main category, and are tags used selectively?
    • Excerpt: Has a custom, compelling excerpt been written to encourage click-throughs?
    • Preview: Have you viewed the post in mobile and desktop preview modes to check the overall layout?

    Final Thoughts on Achieving Publishing Excellence

    Establishing a rigorous publishing protocol is one of the most effective ways to upgrade the professionalism of your website. While drafting content requires creativity and flow, publishing requires structure, attention to detail, and technical discipline. By holding your content to high structural and technical standards, you elevate your brand and ensure your audience receives the best possible reading experience.

    Whether you choose to follow a manual routine or implement automated plugins to enforce your guidelines, consistency is what separates successful websites from the rest. Take the time to implement these checks today, and watch your site's polish, readability, and search performance improve with every single post you share.

  • Managing 10+ WordPress Sites Without Losing Your Mind: A Practical Workflow

    Past three WordPress sites, the bottleneck stops being the writing. It’s the coordination — which site got the article, which one is still on last month’s SEO theme, which credentials you’re juggling in 1Password, why the German site got the English featured image.

    We hit this wall running cross-border e-commerce. Below is the workflow that let us scale to 10+ sites without losing Sundays.

    1. Stop using admin passwords. Use Application Passwords.

    WordPress Application Passwords (built into core since 5.6) give each tool a scoped credential you can revoke without changing your admin login. If your current setup stores admin passwords in a publishing tool, that tool can do anything you can — including delete content. Application Passwords scope to the REST API only.

    In our workbench we never request your admin password. You paste an Application Password once per site and revoke it from Users → Profile the moment you suspect anything.

    2. One dashboard or it doesn’t scale

    If you’re still tab-hopping between five wp-admin screens, every small task — image upload, schedule change, plugin update warning — costs you a context switch. Five sites × twenty switches a day × 15 seconds = 25 minutes lost per day, 8 hours per month, on nothing.

    Centralize. Whether it’s our tool or another, the rule is: every publishing operation lives in one screen, every site selectable from one dropdown.

    3. Per-site voice — or your sites all read the same

    The hidden cost of multi-site AI publishing: by site three, every article sounds identical. Same intro pattern, same “In today’s digital landscape”, same bullet structure. Algorithms are getting better at spotting it.

    Treat each site as a distinct brand voice — formal vs casual, first-person vs third, long-form vs scannable, US English vs AU English. Per-site persona templates make this enforceable rather than aspirational. See how we structured this on the Features page.

    4. Topic libraries scoped per site, not per account

    The fastest way to confuse yourself is to keep one shared keyword list and pull from it for all sites. The fitness site doesn’t want the same intent buckets as the kitchen-appliance site. Topic candidates should live per site, with their own SERP snapshots, their own competitor pages, their own pre-tagged keywords.

    We learned this after publishing the same recipe-themed outline on three unrelated sites because the keyword list wasn’t scoped. It happens.

    5. Schedule a week ahead, then walk away

    The single highest-leverage habit: every Sunday, queue 7 days of content across all sites. Use timezone-aware scheduling so articles publish at peak local time on each site, not your time. Then close the laptop.

    If you can’t walk away after queuing — if you find yourself checking dashboards at 11pm — your queue isn’t actually a queue. It’s an anxiety object.

    6. Logs, not memory

    Memory doesn’t scale across 10 sites. What did each site publish last month? When did you last refresh the SEO meta? Which posts on which sites have GSC clicks above the 90th percentile?

    You need a system that surfaces this without you asking. Per-site analytics with a content suggestion engine pointing at the almost-rank queries from Google Search Console — that’s the difference between “running 10 sites” and operating 10 sites.

    The compounding move

    Each of these is small. Together they compound. The team that ships 30 articles to 5 sites in 2 hours flat isn’t working harder than the team taking 25 hours — they’ve just removed the coordination tax.

    WP Publisher is built on this exact stack. The Free plan is enough to feel the loop; Pro and Agency unlock the multi-site automation when you’re ready. Try it.

  • The Hidden Cost of Manual WordPress Publishing (And How to Reclaim 20+ Hours a Month)

    Most content teams budget for writing. Almost none budget for publishing. That’s the line item that quietly eats 20+ hours a month, and because it’s scattered across thirty 30-minute tasks, nobody sees the bill.

    Let’s do the math, then talk about the fix.

    The publishing step is not free — it’s just invisible

    For one article going live on one WordPress site, the publishing step typically includes:

    • Copy from your draft tool (Notion, Docs, Markdown editor) into the WP block editor — 3–5 min, including format cleanup
    • Find a featured image — search stock, check license, download, upload — 5–8 min
    • Inline images for the body — pick 2–3 more, repeat the upload — 6–10 min
    • Set categories, tags, focus keyword in Yoast or SEOPress — 2–3 min
    • Set the slug, meta title, meta description — 2 min
    • Internal linking pass (find 3–5 related old posts) — 4–6 min
    • Set the publish date in the right timezone — 1 min
    • Final preview and proofread — 3–5 min

    That’s 26–40 minutes per article, after the writing is already done. For a team shipping 30 articles a month, that’s 13–20 hours of pure publishing labor — not strategy, not creativity, not algorithm work. Just shovel work.

    Now multiply by your number of sites

    If you operate 5 sites at 6 articles each per month, the same calculation balloons to 26–40 hours/month on publishing alone. At a $40/hour internal opportunity cost, that’s $1,000–$1,600 a month of someone’s time you’ll never get back.

    Here’s the part that breaks people: that time scales linearly with sites and posts. Twice the sites, twice the hours. Twice the posts, twice the hours. There is no productivity gain from doing it more — it’s the same toll, every time.

    Where the time actually goes (and how to remove each chunk)

    Format cleanup → eliminated by direct API publishing

    The 3–5 min you spend stripping Notion artifacts vanishes when articles are written, formatted, and posted directly through the WordPress REST API. No copy, no paste, no markup repair.

    Image hunt → eliminated by integrated CC0 sources

    We integrate Unsplash, Pexels, and Pixabay (all CC0/permissive) directly into the publishing flow. Search by keyword, click, attribution and metadata are baked in. The 11–18 minutes per article on images compresses to 2–3 minutes — and you have a paper trail in case of a takedown notice. We covered this in detail in the image copyright post.

    SEO setup → eliminated by plugin-aware metadata injection

    We detect SEOPress and Yoast on each connected site and write focus keyword, meta title, meta description, and schema directly. Same for featured image and category mapping. No more plugin-tab-clicking.

    Internal linking → eliminated by automated suggestions

    With per-site analytics and a content map, internal linking turns from a manual hunt into a suggestion list. You accept or reject — you don’t Ctrl+F your own archive.

    Timezone scheduling → eliminated by automatic site detection

    Reading the timezone from each site’s /wp-json endpoint and scheduling in local time means the article publishes at peak local hours on the German site, not 4am German time because you’re in Asia.

    The reclaimed hours: where they actually go

    Teams who automate publishing don’t suddenly publish more articles. They redirect the hours to:

    • Better briefs — the 80/20 of content quality
    • Internal linking strategy across the entire portfolio
    • Topic research depth — fewer thinner posts, more pillar content
    • Link building outreach — the work the algorithm actually rewards

    That’s the real ROI. Not “publish faster.” Publish the right thing instead of the next thing.

    What this looks like in practice

    We use the publishing queue to schedule a week ahead on Sunday across all our sites. Once articles are queued, we don’t touch the queue until next Sunday. Total weekly publishing time: under 90 minutes for ~25 articles.

    Compare that to the manual baseline of 11–17 hours a week. That’s not a 2× improvement — that’s a 7–10× improvement. And the floor keeps falling as we tune persona templates and automation rules.

    Try it yourself with the math you trust

    Don’t take our word for it. Track your actual publishing time for one week. Time how long it takes from “writing done” to “article live, scheduled, indexed.” Multiply by your monthly volume. Then try the Free plan for one week and re-measure.

    If the numbers don’t move, the tool’s wrong for you. If they do, you have a permanent capacity unlock. See plan details.

  • Why Your Editorial Calendar Always Slips Behind — and the Fix That Actually Stuck

    Every content team starts the year with a beautiful editorial calendar in Notion or Airtable. By week three of February, half the rows say “TBD — find topic.” By week five, the calendar is abandoned and someone’s asking ChatGPT for “blog post ideas about productivity” on a Sunday night.

    The failure is rarely discipline. It’s a supply problem. Topic ideas don’t arrive on a regular schedule, and when you run out, you write filler. Filler is what kills your calendar.

    The five-source rule

    We spent 18 months experimenting with topic-research workflows across our own sites. The single change that worked: stop relying on one source. Topic ideas have to come from at least five places, refilled continuously, surfaced in one library.

    Here are the five sources, in rough order of conversion to actually-published articles:

    1. Google Search Console — the queries you almost rank for

    Pages 2–3 of the SERP for queries you already rank on. These are signals from the algorithm that you’re close. Improve the post that almost ranks, or write a sharper companion piece. Highest conversion source — these topics already have impression volume.

    2. Live SERP — what your competitors are publishing

    Pull the top-10 results for your target keyword. Read what they wrote. Find the angle they didn’t cover, the data point they cite without sources, the section every competitor has but none does well. That’s your topic.

    3. People Also Ask boxes — search intent in question form

    PAA is Google telling you, verbatim, what people are confused about. Each PAA box is 4–8 free article ideas. Most teams ignore them because pulling them manually is tedious — automate it.

    4. Reddit — what people complain about, in their own words

    Subreddits adjacent to your niche are the highest-signal source for unfiltered customer language. Pain points, vocabulary, objections. The titles of upvoted posts are draft article titles.

    5. Search autocomplete — the long-tail factory

    Type your seed keyword + every letter of the alphabet. Each autocomplete suggestion is a real query someone is typing. Most are too narrow individually but cluster nicely into pillar articles.

    The library, not the spreadsheet

    Treating these five sources as ad-hoc inputs – spreadsheet with three columns, manual updates – is what makes the calendar fail. The right shape is a library: persistent storage per site, with each topic carrying its source, search intent, projected difficulty, related keywords, and competitor snapshots.

    Once it’s a library, the question stops being “what should we write?” and becomes “which library entry should we promote to the queue this week?” That’s a triage problem, not a creativity problem. Triage scales.

    Per-site, not per-account

    If you run multiple sites, scope the library per site. The kitchen-appliance site’s topic candidates are not the cycling-gear site’s topic candidates. We made this mistake early — published a kitchen-themed outline on a fitness site because the keyword list was shared. Don’t.

    WP Publisher’s topic library is per-site by default. SERP snapshots, GSC imports, Reddit mining, PAA, autocomplete — all captured against the site you ran them on, never bleeding across.

    The Sunday-night cadence that survives

    Once supply is solved, the calendar runs on a 30-minute weekly rhythm:

    1. Open each site’s topic library
    2. Promote 5–7 candidates to the publishing queue
    3. Run deep research on the highest-priority ones (this happens async)
    4. Schedule the queue for the week, in each site’s local timezone
    5. Close the laptop

    That’s it. No more “what should we write this week?” meeting. No more 11pm panic.

    The behavioral lock-in

    Here’s the part most workflow articles don’t mention: the calendar that works is the one you stop checking. The first two weeks you’ll keep peeking — has it published, did it land, is the queue okay. By week four you trust it. By week eight you forget it’s running.

    That’s the goal. Not a beautiful calendar — a calendar that operates without you.

    We built the topic library and queue for exactly this loop. The Free plan includes 3 deep-research runs a month — enough to feel whether the supply problem is actually fixable for your team. Open the workbench.

  • Multi-Language WordPress Publishing: Stop Translating the Same Article Five Times

    I run WordPress sites in English, German, Polish, and Spanish. For a long time, our publishing workflow was: write the English version, send it to translators, paste each translation into the right WordPress install, repeat. Average publish time per article: about 90 minutes — once you account for the translation back-and-forth, format cleanup, and per-locale image swaps.

    That math doesn’t work past two languages. Below is the workflow that does.

    Translation isn’t the bottleneck. Localization is.

    Modern AI translation is good. Not perfect, but good enough for a starting draft on most B2C content. The bottleneck is what comes after the words are in the right language:

    • The slug needs to be locale-specific (not the literal translation)
    • Internal links need to point to the same-locale version of related posts
    • Stock images appropriate for one market may feel off in another
    • Currency, date format, units, and references need to localize
    • Each site has its own SEO plugin config, focus keywords, schema
    • Each site has its own publishing schedule and audience timezone

    These are dozens of micro-decisions per article per locale. Multiply by 5 locales, you’re drowning.

    Step 1: Detect the site’s language automatically

    Manually tagging each connected site with its language is busywork and a source of errors. WordPress exposes language in the /wp-json endpoint. Read it on connect, store it as the site default, never ask again.

    We added explicit URL inference as a fallback (example.de → German, example.pl → Polish, etc.) so even sites without proper locale headers get tagged correctly.

    Step 2: One outline, many drafts

    The expensive part of an article isn’t the words — it’s the outline, the SERP research, the angle. That work is language-agnostic. Run deep research once, in your primary language, and reuse the outline + competitor data for every locale.

    From the same research artifact, you batch-generate per-locale drafts. Each draft inherits the angle and structure but is written from scratch in the target language with locale-aware examples, idioms, and SERP signals.

    Step 3: Locale-aware Reddit and SERP signals

    Most people skip this and it’s where multilingual content usually feels “machine-translated.” If your German draft cites the Reddit thread that was popular on r/personalfinance (US subreddit), the article won’t land in Germany.

    Run the Reddit mining and SERP fetch per locale. The German article cites German subreddits. The Polish article cites Polish forums. This is what moves a translation from “technically accurate” to “sounds local.”

    Step 4: Per-site persona, per-locale tone

    German B2C content trends more direct than US English. Polish has different formality conventions. Australian English differs from US English in vocabulary, idioms, and even humor. Set a persona template per site that captures these, and apply it during generation, not as a post-edit pass.

    We support per-site voice templates that include: target reading level, register (formal/casual), preferred sentence length, locale-specific vocabulary lists, and forbidden phrases. The same outline, run through five different personas, produces five drafts that read like five different writers — not one writer translated five times.

    Step 5: Schedule in the local timezone

    Reading the timezone from each site’s /wp-json and scheduling in local time means your German article publishes at peak Germany time, not 4am German time because your queue thinks in UTC. This is one of those things that costs nothing to get right and bleeds traffic forever when you get it wrong.

    Step 6: Localize images, but cheaply

    You don’t need a different image per locale most of the time. Stock photography is largely culture-neutral. But for anything with text overlays, currency-denominated examples, or country-specific imagery — you need to swap. Built into the publishing flow rather than a post-publish edit.

    The result: one article, five locales, under 10 minutes

    Once these six pieces are wired together, a single article ships across English, German, Polish, Spanish, and Australian English in under 10 minutes of human time per locale — most of it review and final edits, not typing.

    That’s the gap. Manual: 5 articles × 90 min = 7.5 hours. Automated: 5 × ~10 min = under 1 hour. Same output, 8× faster, with locale-appropriate Reddit + SERP signals you wouldn’t have done by hand anyway.

    If you’re running multilingual today

    You don’t need to onboard all your sites at once. Pick one locale you’re currently struggling with — the one that gets the least love because translation is painful — and try it on the Free plan for a week. See if the per-locale draft quality clears your bar.

    See the full multi-language stack on the Features page, or open the workbench.

  • The WordPress Image Copyright Trap (And the 10-Minute Audit That Saves Your Site)

    If you run a WordPress site and you’ve never been served a DMCA notice, you’ve been lucky. The risk grows linearly with content volume, and copyright trolls have automated their pipeline. Reverse image search + threatening letter + settlement demand is a viable business — and small WordPress operators are the margin, because we can’t afford to fight back.

    The good news: this is largely a solved problem. Bad image sourcing is the cause; clean image sourcing is the cure. Below is the audit we run on every site we operate, and the pipeline we use to keep new content safe.

    How the trap works

    The danger isn’t the obvious case (you steal a Getty Images photo from a news site). It’s the subtle ones:

    • You used Google Image Search five years ago and saved an image with no source documented
    • A previous freelancer uploaded it before strict licensing was enforced
    • The image came from a stock site that later went defunct, taking its license records with it
    • The image is “CC0” on Pinterest, but Pinterest’s metadata is wrong — the original is in fact rights-managed
    • An AI tool generated it but trained on copyrighted material; legal status is now murky

    In every one of these scenarios, you cannot prove license compliance — which is the only defense that matters when the letter arrives.

    The 10-minute audit, step by step

    1. Inventory the images

    Pull every image attached to published posts on the site. The WordPress media library count alone is misleading; you want the images actually appearing in live content. If you have access to your DB, this is a SELECT on the post-meta join. We surface this in the workbench automatically.

    2. Bucket by source

    Every image falls into one of four buckets:

    • SAFE — sourced from documented CC0 (Unsplash, Pexels, Pixabay) or you are the original creator
    • LICENSED — paid stock with an active license you can produce on demand
    • UNKNOWN — you cannot prove where it came from
    • RISKY — known to come from a non-permissive source, or appears on copyrighted sources via reverse-image-search

    UNKNOWN and RISKY are the takedown candidates. SAFE and LICENSED you can defend.

    3. Reverse-image-search the UNKNOWN bucket

    For each UNKNOWN image, run a reverse image search to find where else it appears. We use Google Vision Web Detection because it returns more than 10× the matches that human-tier Google Images returns, and structures them by domain.

    If the image appears on a stock-photo site, news site, or major publication and you don’t have a license, that’s a RISKY image — replace it. If it appears only on Unsplash, Pexels, or Pixabay, you’re likely safe — promote to SAFE once you confirm the canonical license URL.

    4. Replace the RISKY ones

    For each RISKY image, find a CC0 alternative on Unsplash, Pexels, or Pixabay using the post’s focus keyword as a search term. Replace in the post, then update the WordPress media library so the dangerous image is no longer served.

    Pro tip: you don’t have to do this all in one sitting. Sort the RISKY list by post traffic and start with your top 10 pages. That’s 80% of your DMCA risk surface in a small afternoon.

    The prevention pipeline (so you never run another audit)

    Auditing is the cleanup pass. The real fix is preventing unsafe images from reaching publish in the first place.

    1. Lock image sourcing to CC0 pools. Every image inserted into an article comes from Unsplash, Pexels, or Pixabay. No drag-and-drop from random folders. No copy from Google Images.
    2. Bake attribution into upload. Each image uploaded to WordPress carries the source URL and license in its alt-text or media-library description. If a takedown letter arrives in two years, the evidence is still attached.
    3. Filter AI-generated placeholders. Some AI drafting tools insert speculative image placeholders that get accidentally published. We strip these before publish so a placeholder never goes live.
    4. Re-audit on a quarterly cadence. The surface area only grows. Set a calendar event.

    What we built into WP Publisher

    Because we operate our own portfolio of WordPress sites and live with the same risk:

    • Image search is restricted to Unsplash + Pexels + Pixabay (CC0)
    • Attribution metadata is auto-attached on upload
    • The audit scanner runs Google Vision Web Detection over your existing media library and buckets each image SAFE / LICENSED / UNKNOWN / RISKY
    • The unsafe-replace flow lets you swap risky images with one click
    • Persistent scan reports — re-audit anytime, see the diff

    See the full feature stack on the Features page. The user-level audit panel is at /account/copyright after you sign in.

    If you take one thing from this post

    Audit your top 10 pages by traffic for image risk. Today, not when the letter arrives. The audit is 10 minutes; the settlement letter is $500–$5,000 minimum and a permanent legal record.

    Open the workbench on the Free plan and run the scan over one site. If it finds anything, you’ve already saved more than the cost of a year of Pro.