Tag: WordPress

  • Integracja Google Search Console z WordPressem: wordpress search console integration w praktyce wydawcy

    Integracja Google Search Console z WordPressem: wordpress search console integration w praktyce wydawcy

    Schemat lub grafika przedstawiająca połączenie Google Search Console z platformą WordPress, symbolizujące integrację danych SEO.
    Schemat lub grafika przedstawiająca połączenie Google Search Console z platformą WordPress, symbolizujące integrację danych SEO.

    Photo by AS Photography on Pexels

    W cyfrowym publikowaniu treści organiczna widoczność w wyszukiwarce stanowi fundament budowania zaangażowanej społeczności czytelników. Każda redakcja, niezależnie od tego, czy zarządza niszowym blogiem tematycznym, czy dynamicznym portalem informacyjnym, potrzebuje wiarygodnego źródła danych na temat zachowania odbiorców w wynikach wyszukiwania. Właściwie przeprowadzona wordpress search console integration otwiera przed wydawcą bezpośredni wgląd w to, jak roboty indeksujące postrzegają serwis oraz jakie zapytania sprowadzają użytkowników do poszczególnych artykułów. Zamiast opierać decyzje redakcyjne na domysłach, twórcy zyskują precyzyjne narzędzie analityczne, które pozwala na bieżąco monitorować skuteczność publikacji, diagnozować problemy techniczne i optymalizować treści pod kątem realnych potrzeb odbiorców.

    Połączenie systemu zarządzania treścią z oficjalnym panelem analitycznym Google likwiduje lukę informacyjną między procesem pisania a późniejszą dystrybucją materiałów. Zrozumienie mechanizmów stojących za tym procesem pozwala nie tylko na szybsze wprowadzanie nowych wpisów do indeksu, ale także na skuteczną obronę wypracowanych pozycji w organicznych wynikach wyszukiwania.


    Dlaczego sprawny przepływ danych z Google to podstawa pracy redakcji

    Tworzenie angażujących artykułów wymaga znacznych nakładów pracy, jednak nawet najlepsza treść nie spełni swojego zadania, jeśli pozostanie niewidoczna dla odbiorców. Narzędzie Google Search Console dostarcza bezcennych informacji prosto z pierwszej linii kontaktu witryny z algorytmami wyszukiwarki. Dla wydawców internetowych kluczowe staje się śledzenie takich metryk jak:

    Dashboard Google Search Console pokazujący kluczowe wskaźniki SEO: wyświetlenia (Impressions), kliknięcia (Clicks), CTR i średnią pozycję (Average Position) z danymi analitycznymi.
    Dashboard Google Search Console pokazujący kluczowe wskaźniki SEO: wyświetlenia (Impressions), kliknięcia (Clicks), CTR i średnią pozycję (Average Position) z danymi analitycznymi.

    Photo by Stephen Phillips – Hostreviews.co.uk on Unsplash

    • Liczba wyświetleń (Impressions) – informuje, jak często adresy URL z Twojej witryny pojawiają się na ekranach użytkowników poszukujących konkretnych informacji.
    • Liczba kliknięć (Clicks) – wskazuje rzeczywisty ruch organiczny przechodzący z wyników wyszukiwania bezpośrednio na strony Twoich artykułów.
    • Średni współczynnik klikalności (CTR) – określa procentowy stosunek kliknięć do wyświetleń, stanowiąc doskonały wskaźnik atrakcyjności tytułów oraz opisów w wynikach wyszukiwania.
    • Średnia pozycja (Average Position) – obrazuje przeciętne miejsce, na którym wyświetlają się Twoje publikacje na wybrane zapytania.

    Monitorowanie tych danych pozwala wydawcy natychmiast identyfikować artykuły, które mają wysoki potencjał zasięgowy, lecz wymagają dopracowania nagłówków w celu poprawy współczynnika kliknięć. Co więcej, bieżący dostęp do statystyk ułatwia planowanie kalendarza publikacji w oparciu o rosnące trendy i zapytania wpisywane przez czytelników.


    Metody weryfikacji a wordpress search console integration: Wybór optymalnej ścieżki

    Zanim dane analityczne zaczną spływać do Twojego panelu, konieczne jest udowodnienie prawa własności do danej witryny. Google oferuje kilka ścieżek weryfikacji, które różnią się poziomem zaawansowania technicznego oraz zakresem zbieranych danych. Dobór odpowiedniej metody decyduje o stabilności całego połączenia i wygodzie zarządzania serwisem w przyszłości.

    Grafika przedstawiająca różne metody weryfikacji witryny w Google Search Console: DNS, meta tag HTML i przez dedykowane rozszerzenia (API), z opisem ich poziomu trudności.
    Grafika przedstawiająca różne metody weryfikacji witryny w Google Search Console: DNS, meta tag HTML i przez dedykowane rozszerzenia (API), z opisem ich poziomu trudności.

    Photo by Zulfugar Karimov on Unsplash

    Metoda weryfikacji Poziom trudności Zakres zbieranych danych Wymagane uprawnienia
    Weryfikacja na poziomie domeny (DNS) Średni Pełna domena, wszystkie subdomeny oraz protokoły (http/https) Dostęp do panelu zarządzania strefą DNS u rejestratora domeny
    Weryfikacja znacznikiem HTML (Prefiks adresu URL) Niski Wyłącznie określony protokół i dokładny adres (np. https://twojadomena.pl) Uprawnienia administratora w systemie WordPress
    Weryfikacja przez dedykowane rozszerzenia (API) Bardzo niski Zależny od wybranego prefiksu lub domeny Uprawnienia administratora w WordPressie i konto Google

    Weryfikacja na poziomie rekordu DNS

    Weryfikacja całej domeny za pomocą rekordu tekstowego DNS jest uznawana za najbardziej wszechstronne rozwiązanie. Pozwala ona na zbieranie zagregowanych danych ze wszystkich wariantów adresów URL, w tym wersji z przedrostkiem „www”, bez niego oraz ewentualnych subdomen redakcyjnych. Wymaga to zalogowania się do panelu firmy hostingowej lub rejestratora domeny i wklejenia wygenerowanego ciągu znaków w sekcji rekordów TXT.

    Weryfikacja za pomocą znacznika meta w nagłówku strony

    Dla wielu wydawców prostszą i szybszą ścieżką jest metoda prefiksu adresu URL z wykorzystaniem znacznika HTML. Polega ona na pobraniu unikalnego fragmentu kodu z konsoli wyszukiwarki i umieszczeniu go w sekcji nagłówkowej strony internetowej. W środowisku WordPress proces ten nie wymaga bezpośredniej edycji plików motywu, co minimalizuje ryzyko wystąpienia błędów technicznych przy kolejnych aktualizacjach systemu.


    Jak krok po kroku przeprowadzić wordpress search console integration w kokpicie redakcyjnym

    Integracja panelu analitycznego z WordPressem może zostać zrealizowana w sposób w pełni bezkodowy dzięki bogatemu ekosystemowi rozszerzeń. Nowoczesne wtyczki optymalizacyjne oraz narzędzia analityczne pozwalają na synchronizację danych poprzez bezpieczne połączenie z interfejsem programistycznym Google. Wiele popularnych narzędzi optymalizacyjnych, posiadających setki tysięcy aktywnych instalacji w witrynach na całym świecie, oferuje dedykowane moduły umożliwiające podgląd kluczowych statystyk bezpośrednio w kokpicie redakcyjnym.

    Infografika lub schemat przedstawiający pięć kroków integracji Google Search Console z WordPressem, od utworzenia usługi po zgłoszenie mapy witryny.
    Infografika lub schemat przedstawiający pięć kroków integracji Google Search Console z WordPressem, od utworzenia usługi po zgłoszenie mapy witryny.

    Photo by Firmbee.com on Pexels

    • PROCES INTEGRACJI KROK PO KROKU
      1. Utworzenie usługi w panelu Google Search Console
      1. Wybór metody weryfikacji (Domena lub Prefiks URL)
      1. Implementacja znacznika lub połączenie przez API w WP
      1. Potwierdzenie własności w konsoli wyszukiwarki
      1. Zgłoszenie mapy witryny XML

    Krok 1: Dodanie nowej usługi w narzędziu Google

    1. Zaloguj się na swoje konto w usłudze Google Search Console.
    2. W lewym górnym rogu wybierz opcję dodania nowej usługi.
    3. Wybierz typ właściwości: „Domena” (dla pełnej analityki DNS) lub „Prefiks adresu URL” (dla szybkiej integracji znacznikowej).
    4. Wpisz pełny adres swojej strony internetowej, upewniając się, że podajesz właściwy protokół szyfrowania.

    Krok 2: Konfiguracja połączenia w systemie WordPress

    W zależności od wybranego rozwiązania technicznego, proces wdrożenia w panelu WordPressa przebiega według następujących kroków:

    1. Przez rozszerzenie analityczne z autoryzacją konta: Po zainstalowaniu i aktywacji wybranej wtyczki analitycznej przejdź do kreatora konfiguracji. Kliknij przycisk logowania kontem Google, wybierz profil powiązany z konsolą i zaakceptuj niezbędne uprawnienia dostępu do danych. System automatycznie zweryfikuje własność i nawiąże bezpieczne połączenie.
    2. Przez wtyczkę optymalizacyjną (SEO): Otwórz ustawienia narzędzi internetowych w używanej wtyczce do zarządzania widocznością. Odszukaj pole dedykowane kodowi weryfikacyjnemu Google i wklej tam ciąg alfanumeryczny skopiowany z panelu wyszukiwarki. Zapisz zmiany w ustawieniach.

    Krok 3: Finalizacja i potwierdzenie weryfikacji

    Po zapisaniu zmian w panelu administracyjnym WordPressa wróć do karty Google Search Console i kliknij przycisk potwierdzenia. System natychmiast odpyta Twoją stronę o obecność znacznika lub sprawdzi rekordy domenowe, po czym wyświetli komunikat o pomyślnym zakończeniu procesu.


    Zgłaszanie mapy witryny i zarządzanie indeksowaniem nowych publikacji

    Samo połączenie usług to dopiero początek efektywnej pracy nad widocznością serwisu. Aby roboty indeksujące mogły natychmiast dowiadywać się o nowych artykułach, aktualizacjach starszych wpisów czy zmianach w strukturze kategorii, niezbędne jest dostarczenie aktualnej mapy witryny w formacie XML.

    Schemat przepływu pracy mapy witryny XML, od publikacji wpisu w WordPressie przez automatyczną aktualizację mapy sitemap.xml po odczytanie i indeksowanie przez roboty Google Search Console.
    Schemat przepływu pracy mapy witryny XML, od publikacji wpisu w WordPressie przez automatyczną aktualizację mapy sitemap.xml po odczytanie i indeksowanie przez roboty Google Search Console.

    Photo by 1981 Digital on Unsplash

    • STRUKTURA PRZEPŁYWU MAPY WITRYNY XML
    • WordPress / Redaktor publikuje wpis
    • Automatyczna aktualizacja mapy sitemap.xml przez wtyczkę
    • Google Search Console odczytuje mapę i kieruje roboty indeksujące

    Większość modułów SEO w WordPressie automatycznie generuje mapę witryny pod standardowym adresem (najczęściej kończącym się fragmentem sitemap_index.xml lub sitemap.xml). Aby zgłosić mapę:

    1. Przejdź do sekcji „Mapy witryn” w bocznym menu konsoli.
    2. W polu wprowadzania adresu wklej końcówkę adresu URL prowadzącą do głównego pliku mapy.
    3. Kliknij przycisk przesyłania i poczekaj na przetworzenie struktury przez algorytmy.

    Dzięki temu zabiegowi wyszukiwarka otrzymuje przejrzysty spis wszystkich wartościowych stron w Twojej domenie wraz z informacją o dacie ich ostatniej modyfikacji, co znacząco przyspiesza proces indeksowania świeżych wiadomości.


    Wykorzystanie danych po udanej wordpress search console integration do rozwoju publikacji

    Obecność danych wyszukiwania bezpośrednio w środowisku pracy redakcji pozwala na natychmiastowe wdrażanie działań optymalizacyjnych bez konieczności ciągłego przełączania się między wieloma zewnętrznymi narzędziami. Wydawcy mogą analizować zachowanie czytelników na kilku kluczowych płaszczyznach.

    Analiza zapytań generujących ruch

    Sprawdzając, na jakie konkretnie słowa i frazy kluczowe wyświetlają się poszczególne artykuły, redaktorzy mogą:

    • Identyfikować niezagospodarowane wątki poboczne i tworzyć kolejne, uzupełniające publikacje.
    • Uzupełniać istniejące teksty o brakujące odpowiedzi na pytania czytelników.
    • Dostosowywać nagłówki śródtytułowe do języka naturalnego używanego przez odbiorców w zapytaniach.

    Optymalizacja wskaźnika CTR

    Gdy artykuł zajmuje wysokie pozycje w rankingu (np. miejsca w pierwszej trójce wyników), ale charakteryzuje się niskim współczynnikiem klikalności, jest to wyraźny sygnał, że tytuł lub opis meta nie przyciągają uwagi użytkownika. Wydawca może przetestować bardziej angażujący nagłówek, dodać elementy wzbudzające ciekawość lub precyzyjniej wskazać korzyść płynącą z przeczytania tekstu.


    Diagnozowanie i rozwiązywanie problemów z indeksowaniem treści

    Prawidłowo zintegrowana konsola wyszukiwania działa jak system wczesnego ostrzegania dla portalu wydawniczego. Wszelkie usterki techniczne, awarie serwera lub błędy w strukturze linków wewnętrznych mogą negatywnie wpływać na zasięgi organiczne.

    Do najczęstszych obszarów wymagających regularnej kontroli należą:

    1. Niezamierzone blokady indeksowania: Przypadkowe zaznaczenie opcji blokowania robotów w ustawieniach czytania WordPressa lub błędne reguły w pliku robots.txt mogą całkowicie wykluczyć witrynę z wyników wyszukiwania. Raporty stanu indeksowania natychmiast wskazują takie anomalie.
    2. Błędy odpowiedzi serwera (kody 5xx): Wskazują na chwilowe przeciążenia hostingu w momentach wzmożonego ruchu, co uniemożliwia robotom odczytanie treści artykułu.
    3. Nieprawidłowości w adresach kanonicznych: Występują, gdy system CMS wskazuje inną wersję adresu jako nadrzędną, co może prowadzić do pomijania właściwych publikacji w procesie ustalania rankingu.

    Regularny przegląd raportu dotyczącego stron i stanu indeksacji pozwala wyeliminować wąskie gardła technologiczne, zanim przełożą się one na zauważalny spadek liczby czytelników.


    Podsumowanie i plan działania dla twórców treści

    Wdrożenie stałego monitoringu widoczności witryny to niezbędny krok w profesjonalizacji każdego przedsięwzięcia wydawniczego opartego na systemie WordPress. Przejście od intuicyjnego tworzenia treści do zarządzania publikacjami w oparciu o rzetelne wskaźniki wyszukiwania stanowi klucz do stabilnego wzrostu ruchu organicznego.

    Grafika przedstawiająca tygodniowy i miesięczny plan działania dla redakcji, wykorzystujący dane z Google Search Console do monitorowania i optymalizacji treści.
    Grafika przedstawiająca tygodniowy i miesięczny plan działania dla redakcji, wykorzystujący dane z Google Search Console do monitorowania i optymalizacji treści.

    Photo by Stephen Phillips – Hostreviews.co.uk on Unsplash

    Aby w pełni wykorzystać potencjał zintegrowanych narzędzi, warto wdrożyć stałą redakcyjną rutynę:

    • Raz w tygodniu: Przeglądaj raporty skuteczności, aby identyfikować najchętniej czytane artykuły oraz nowe zapytania zyskujące popularność.
    • Po każdej publikacji: Upewnij się, że nowa treść została poprawnie ujęta w mapie witryny XML.
    • Raz w miesiącu: Sprawdzaj raport stanu indeksowania pod kątem ewentualnych błędów technicznych i nieprawidłowych przekierowań.

    Dzięki takiemu podejściu Twój serwis zachowa wysoką kondycję techniczną, a każda nowa publikacja zyska optymalne warunki do walki o czołowe pozycje w wynikach wyszukiwania.
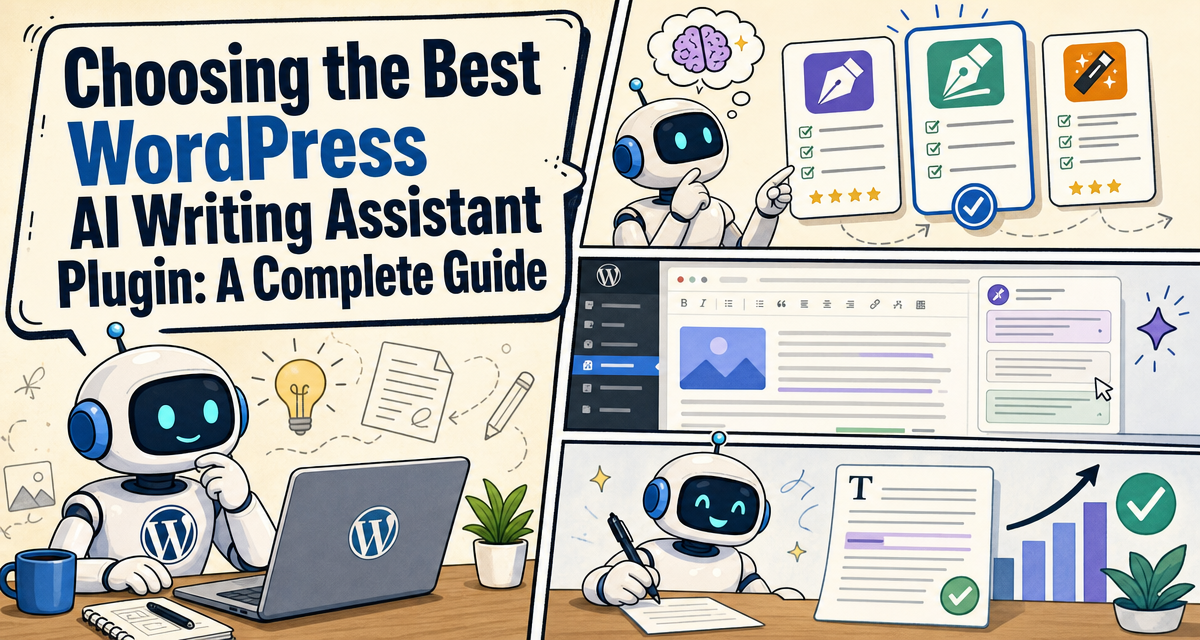
  • Choosing the Best WordPress AI Writing Assistant Plugin: A Complete Guide

    Choosing the Best WordPress AI Writing Assistant Plugin: A Complete Guide

    Choosing the Best WordPress AI Writing Assistant Plugin: A Complete Guide

    The demands on modern content creators, bloggers, and web developers are higher than ever. To maintain a competitive edge, publishing consistent, high-quality content is no longer optional—it is a baseline requirement. However, the traditional writing process, which involves bouncing between external drafting apps, spelling checkers, research tabs, and your content management system, can severely fragment your workflow.

    This is where a dedicated WordPress AI writing assistant plugin changes the game. By embedding artificial intelligence directly into your WordPress dashboard, these plugins bridge the gap between ideation and publication. Instead of relying on bulk, generic text generators that produce robotic articles, modern AI assistants work alongside you inside your editor, helping you refine your prose, design clean layouts, and optimize your writing in real time.


    What is a WordPress AI Writing Assistant Plugin and How Does It Work?

    A WordPress AI writing assistant plugin is a software extension that integrates directly with your website's editor—primarily the Gutenberg block editor, but often extending to other editing environments. Unlike standalone software-as-a-service (SaaS) copywriting tools that require you to copy and paste text back and forth, these plugins live where your content is born.

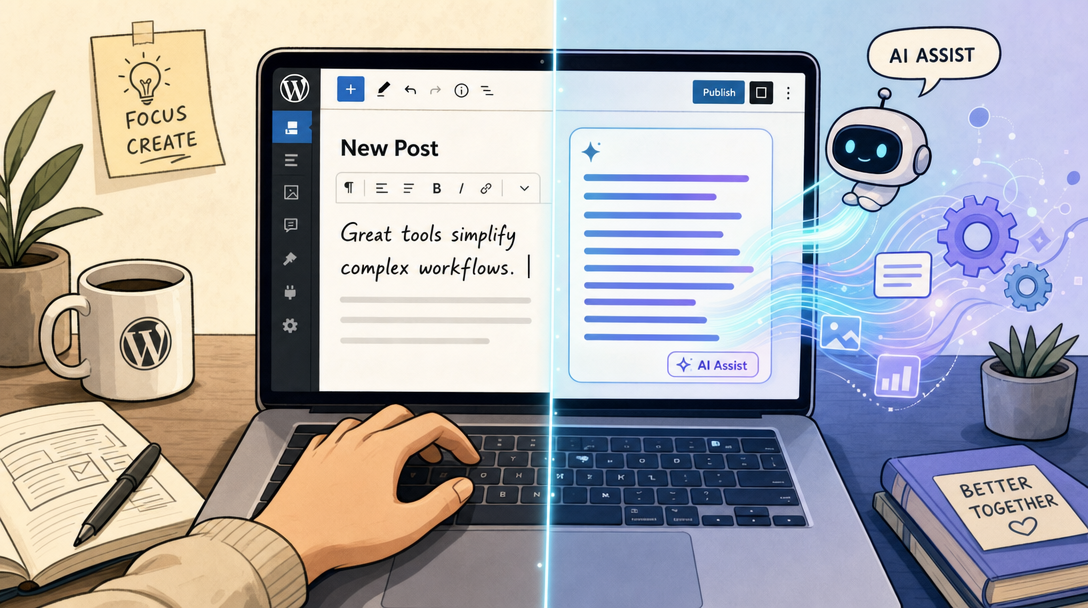
    AI assistant helps a writer create content within the WordPress editor.
    AI assistant helps a writer create content within the WordPress editor.

    Seamless Dashboard Integration

    When you install an AI assistant, it becomes a native part of your writing environment. If you use the standard Gutenberg editor, the AI assistant usually manifests as a block type or an inline contextual menu. As you highlight a sentence or insert a new block, you can prompt the AI to expand your thoughts, simplify complex vocabulary, translate text, or adjust your tone.

    This native positioning minimizes context switching. You no longer have to leave your tab to verify grammar, rewrite a clumsy sentence, or generate a structured list. Everything happens natively, allowing you to maintain your creative momentum. For creators looking to optimize their overall publishing workflow, leveraging platforms like wp-publisher.com can make content distribution seamless.

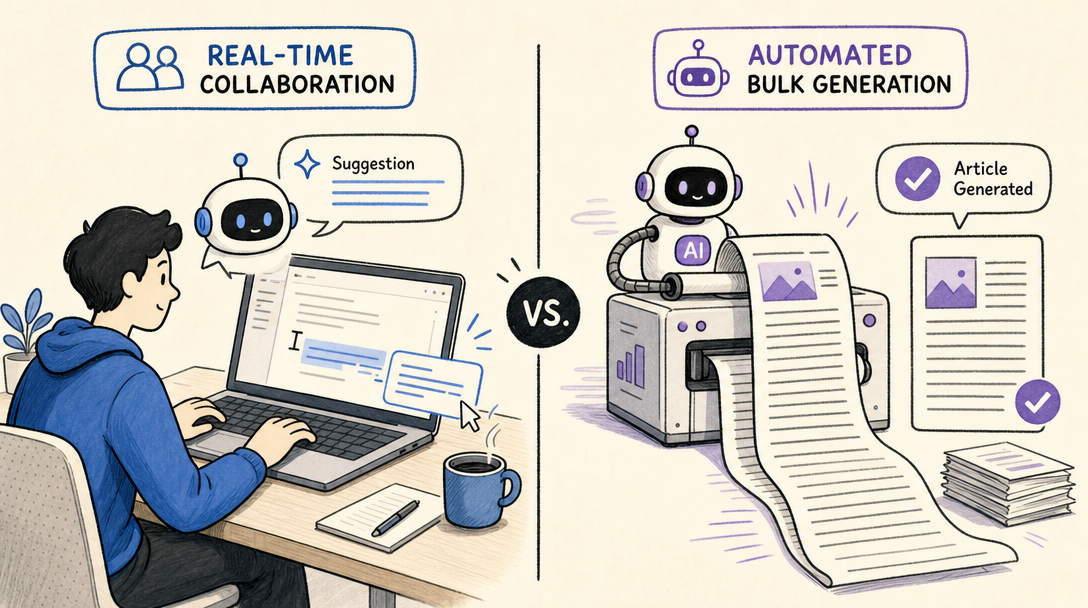
    Interactive "As-You-Write" Assistance vs. Bulk Generation

    It is important to understand the structural difference between an interactive AI assistant and a bulk article generator:

    Interactive AI writing and bulk AI content generation shown side-by-side.
    Interactive AI writing and bulk AI content generation shown side-by-side.
    • Bulk Generators: These tools typically require a single prompt or keyword and spit out a fully formed, multi-paragraph article. While fast, the output often lacks a cohesive human voice, requires heavy editing, and risks feeling detached or repetitive.
    • Interactive Writing Assistants: These plugins act as digital co-writers. They listen to your inputs block-by-block. If you are struggling with a transition paragraph, the assistant can suggest the next logical sentence. If a paragraph is too dense, it can rewrite it for better readability. They are designed to support and elevate your unique perspective rather than replace it entirely.

    Top WordPress AI Writing Assistant Plugins Compared

    The ecosystem of AI plugins is expanding rapidly, with different developers taking unique approaches to integration, cost control, and model support. Understanding the strengths of the leading options can help you select the tool that best fits your creative process.

    Jetpack AI Assistant

    Jetpack is one of the most widely used plugin suites in the WordPress ecosystem, and its native AI Assistant brings powerful text and formatting capabilities directly into the Gutenberg block editor.

    Because Jetpack is deeply integrated with the core block system, its assistant is exceptionally good at structural tasks. It does not just write paragraphs; it can build structured data tables, create custom forms, and generate relevant post images on the fly. This makes it a highly visual assistant that helps you build rich media posts without needing external graphic design or data formatting tools.

    WP Wand

    For creators who want ultimate control over the underlying artificial intelligence models powering their site, WP Wand offers a highly flexible approach. Instead of tying you to a single proprietary system, WP Wand allows users to connect their own API keys from top-tier AI providers.

    This plugin supports connections to OpenAI, Anthropic (Claude), OpenRouter, and DeepSeek. By inputting your personal developer key, you bypass the marked-up subscriptions of typical SaaS tools and pay the raw processing costs directly to the AI providers. It also features robust translation options and prompt frameworks designed to guide your writing seamlessly from draft to polished piece.

    Key Features and Models At a Glance

    To make the differences clearer, let us compare how these leading approaches stack up in terms of integration, model flexibility, and overall strengths:

    Plugin Name Primary Editor Integration Supported AI Models Key Strengths Pricing Structure
    Jetpack AI Assistant Native Gutenberg Blocks Proprietary & Partner Models Seamless block formatting (tables, forms, images) Free tier / Paid plans from $4.95/month
    WP Wand WordPress block editor OpenAI, Claude, OpenRouter, DeepSeek Multi-model API flexibility, extreme cost control Freemium (Use your own API keys)
    Generic API Connectors Gutenberg & Classic Editor OpenAI / Custom endpoints Direct LLM communication, zero subscription fees Pay-per-use via developer accounts

    API-Based Plugins vs. SaaS Subscriptions: A Cost Analysis

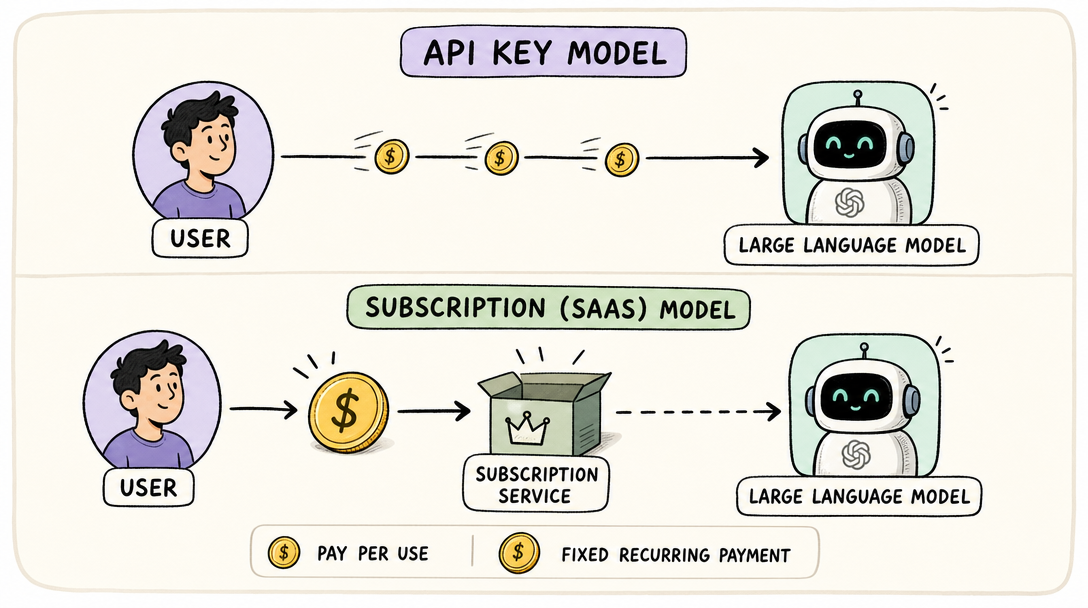
    One of the most important decisions you will make when choosing a WordPress AI writing assistant plugin is how you pay for the underlying artificial intelligence. The market is split into two primary business models: traditional SaaS subscriptions and direct API integrations.

    Two payment models for AI plugins: direct API versus monthly subscription.
    Two payment models for AI plugins: direct API versus monthly subscription.

    The SaaS Subscription Model

    Under a subscription model, you pay a flat monthly or annual fee directly to the plugin developer or an external service. For example, Jetpack AI Assistant offers a promotional tier starting at $4.95 per month, which eventually transitions to standard renewal pricing.

    The primary benefit of this model is simplicity. You do not have to set up developer accounts, manage billing keys, or worry about fluctuating costs based on your monthly word count. You pay a predictable fee and get a set amount of usage, making it ideal for casual bloggers or small business owners who value convenience above all else.

    The Direct API Key Model

    For high-volume publishers, agencies, and web developers, the direct API key model is highly efficient. Plugins like WP Wand let you generate your own API credentials directly from providers like OpenAI or Anthropic and paste them into your plugin settings.

    When you write using your own API key, you bypass the middleman. Instead of paying a flat $50 per month to an external writing platform, you pay fractions of a cent per word directly to the AI provider. Under this pay-as-you-go structure, drafting a comprehensive, well-structured article often costs just a few cents in raw API usage. If you are unsure about how AI credits or API keys translate to your dashboard, reviewing a comprehensive frequently asked questions page can clarify how these integrations operate.


    How to Use an AI Assistant to Improve Post Readability and Formatting

    Creating content that ranks well and keeps visitors on your page requires more than just correct spelling. Your posts must be highly readable, logically structured, and engaging. A quality AI assistant serves as a direct editorial coach to help you reach these benchmarks.

    Improving Sentence Structure and Readability

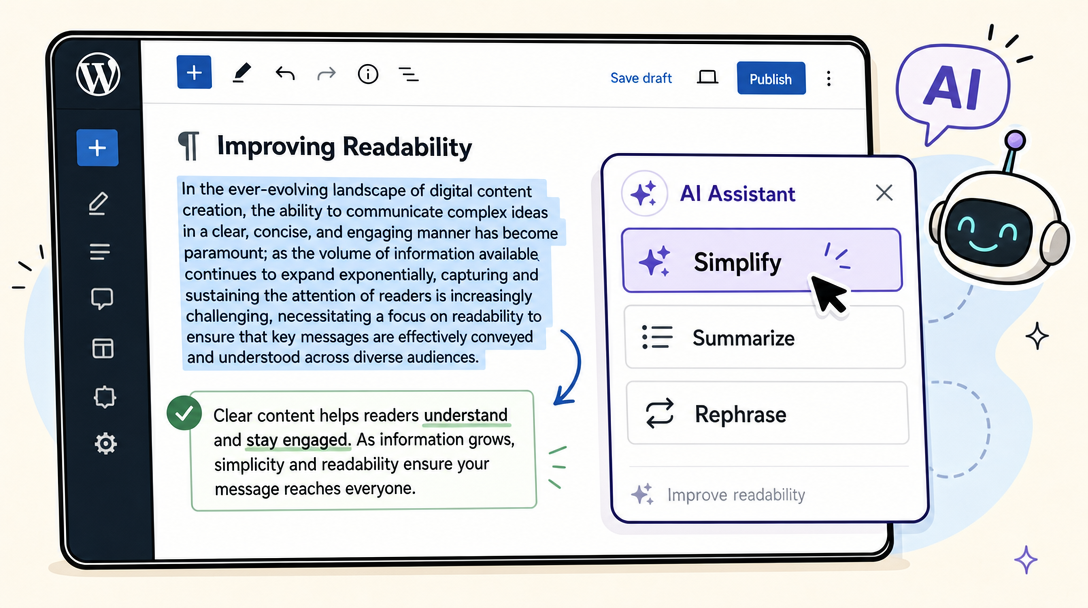
    Long, run-on sentences and dense academic jargon can cause readers to click away from your site. An inline AI assistant can instantly scan your text to identify readability bottlenecks.

    By highlighting a complex passage, you can instruct the assistant to "simplify" or "summarize." The AI will break up long sentences, substitute passive voice with active verbs, and suggest bullet points to make the information highly digestible. This immediate feedback loop helps you maintain a high readability score throughout your writing process.

    AI assistant simplifies highlighted text within a WordPress editor screen.
    AI assistant simplifies highlighted text within a WordPress editor screen.

    Generating Structural and Media Elements

    Great blog posts are not just walls of text; they use visual cues to guide the reader's eye. Advanced assistants can handle these layout challenges natively:

    • Structured Tables: If you are listing product specifications, pricing tiers, or comparison metrics, you can ask the assistant to format that data into a clean, responsive table.
    • Pre-filled Forms: For lead generation or reader feedback, some advanced tools can generate functional form blocks tailored to the context of your post.
    • Post Images: Visual search is crucial. Integrated AI image generators can construct relevant visual elements that match the tone and topic of your written content, keeping users on your page longer.

    Best Practices for Writing Safely with AI in WordPress

    As helpful as AI writing assistants are, relying too heavily on automated generation carries distinct risks. To ensure your website maintains its search engine visibility and builds long-term trust with your audience, you must follow a balanced, responsible approach to AI integration.

    Human writer diligently edits and fact-checks AI-generated content.
    Human writer diligently edits and fact-checks AI-generated content.

    Keep a "Human-in-the-Loop"

    The single most important rule of working with artificial intelligence is to never publish raw, unedited AI content. Your audience visits your site for your unique insights, personal experiences, and distinct perspective.

    Use your WordPress AI writing assistant plugin to handle the heavy lifting of drafting, researching, structuring, and brainstorming. Once the initial draft is complete, step in as the primary editor. Inject your personal anecdotes, verify the tone, and ensure that the finished piece reads like it was written by a real human expert. Many developers prefer managing their publishing schedules on a dedicated publishing application to ensure cross-platform consistency.

    Rigorous Fact-Checking

    Large language models do not "know" facts; they predict the next most logical word based on patterns in their training data. This means they are prone to "hallucinations"—confidently stating incorrect dates, historical facts, scientific statistics, or technical instructions.

    Before hitting publish, verify every statistic, claim, and source link generated by your AI tool. A single unverified claim can damage your brand's authority and alienate your readership.

    Respecting Data Privacy and Security

    When you use an AI plugin, your draft content is sent to third-party servers (like OpenAI or Anthropic) for processing. If you are drafting highly sensitive business reports, proprietary product announcements, or personal client details, review the data usage policies of both your plugin and your API provider. Ensure that your inputs are not being utilized to train public machine learning models without your explicit consent.


    Elevating Your Content Strategy

    Integrating a WordPress AI writing assistant plugin into your website is one of the most effective ways to scale your content output without sacrificing quality. Whether you choose a native, all-in-one system like Jetpack AI to format beautiful blocks, or opt for an open-ended API tool like WP Wand to keep your operational costs low, these assistants act as valuable partners in the creative process.

    By combining the structural efficiency of artificial intelligence with your personal expertise, research, and unique editorial voice, you can produce highly readable, deeply engaging content that resonates with readers and stands out across the web.

    Related reading

  • The Ultimate WP Publishing Checklist for Flawless Content Every Time

    The Ultimate WP Publishing Checklist for Flawless Content Every Time

    The Ultimate WP Publishing Checklist for Flawless Content Every Time

    An illustration depicting a comprehensive WordPress publishing checklist with items related to quality, SEO, and formatting.
    An illustration depicting a comprehensive WordPress publishing checklist with items related to quality, SEO, and formatting.

    Photo by Souvik Banerjee on Unsplash

    Creating high-quality content is only half the battle of running a successful website. Ensuring that your layout is clean, your search engine optimization (SEO) is dialed in, and your formatting is absolutely flawless requires a systematic approach. Without a structured wp publishing checklist, even the most experienced editorial teams can overlook small mistakes that impact reader engagement and search rankings. From broken links and messy typography to missing image descriptions, a single oversight can undermine your hard work.

    In a fast-paced digital landscape, consistency is key to building authority and keeping readers on your site. Establishing a standardized workflow allows you to transition seamlessly from a raw draft to a polished, professional piece of digital media. By auditing your layout, technical components, and metadata before clicking the publish button, you protect your brand image and ensure a premium user experience.


    Why Your Website Needs a Standardized WP Publishing Checklist

    When multiple authors, editors, and contributors collaborate on a single platform, keeping a cohesive editorial standard can be extremely challenging. Even if you are a solo blogger, human error is inevitable when you rely solely on memory. A systematic approach to publishing acts as a final quality control layer, ensuring that every article meets your site’s rigorous requirements.

    Implementing a uniform process reduces the friction of content production. Instead of second-guessing whether you have completed every optimization step, you can systematically work through a clear set of guidelines. To explore more resources and editorial strategies designed for modern creators, you can visit wp-publisher.com to discover tools that elevate your content strategy.

    A standardized process also ensures that your search engine optimization remains uniform across hundreds of posts. SEO is not a one-time setup; it is a continuous practice of maintaining clean code, descriptive URLs, logical header structures, and optimized images. When these factors are managed systematically, search engines can crawl, index, and rank your content far more effectively.


    The Ultimate WP Publishing Checklist: A Step-by-Step Blueprint

    A visual blueprint or diagram illustrating a smooth, step-by-step publishing workflow for WordPress content.
    A visual blueprint or diagram illustrating a smooth, step-by-step publishing workflow for WordPress content.

    Photo by Ferenc Almasi on Unsplash

    To make your publishing workflow as smooth as possible, we have broken down the process into five core areas. By addressing these steps in order, you can catch formatting anomalies and technical issues before they ever reach your audience.

    1. Typography, Formatting, and Code Clean-up

    A visual representation of clean typography, correctly formatted headings (H1, H2, H3), and clutter-free code within a content editor.
    A visual representation of clean typography, correctly formatted headings (H1, H2, H3), and clutter-free code within a content editor.

    Photo by Ferenc Almasi on Unsplash

    Many content creators write their drafts in external word processors such as Google Docs or Microsoft Word before moving them over to the block editor. While these programs are excellent for drafting and collaborating, copying and pasting text directly into your website can sometimes import hidden code, unnecessary styling tags, or formatting irregularities.

    • Pasting Safely: Use plain text pasting options or clear the formatting of pasted text to ensure no external stylesheet instructions interfere with your site’s native design.
    • Checking Paragraph Lengths: Keep your paragraphs short (typically two to four sentences) to maximize readability on mobile devices.
    • Logical Heading Flow: Ensure your headings follow a strict, logical hierarchy. Never skip heading levels (for instance, do not jump directly from an H2 to an H4), and verify that there is only one main title (H1) per page.

    2. URL and Permalink Optimization

    The permalink, or URL slug, is one of the first elements search engines and readers look at to understand what your page is about. Leaving your URL as a generic string of numbers or a direct copy of a long headline is a missed opportunity for optimization.

    • Descriptive Slugs: Keep slugs short, descriptive, and directly related to your primary topic.
    • Proper Formatting: Use lower-case letters and separate words strictly with hyphens. Avoid special characters or punctuation marks that could break link sharing.
    • Future-Proofing: Avoid putting specific dates or years in your URL unless absolutely necessary. This allows you to update the content in the future without changing the link structure and losing established search equity.

    3. Media Optimization and Accessibility

    An image showing a compressed image file next to text explaining alt attributes and descriptive file naming, emphasizing web accessibility.
    An image showing a compressed image file next to text explaining alt attributes and descriptive file naming, emphasizing web accessibility.

    Photo by Lukas Müller on Unsplash

    Images and visual aids keep readers engaged, but they can also slow down your site if they are not formatted correctly. Furthermore, making sure your media is accessible to all users is a fundamental part of modern web standards.

    • Image Compression: Compress all images before uploading them to prevent slow page load speeds, which can negatively impact both user experience and search rankings.
    • Descriptive Alt Text: Add clear, descriptive alternative (alt) text to every image. Alt text helps visually impaired readers using screen readers understand your visuals and provides search engines with context.
    • Proper File Names: Rename your image files using descriptive, hyphen-separated keywords instead of generic names like "image_01.png."

    4. Taxonomy and Categorization

    Proper site architecture relies heavily on how you organize your content. Categories and tags help users navigate your site and help search engines understand the relationships between different pieces of content.

    • Assigning Categories: Place your post into one primary category that accurately reflects its overarching theme.
    • Strategic Tagging: Use a few relevant tags to connect the post to specific sub-topics without over-cluttering your site taxonomy.
    • Checking the Excerpt: Write a concise, engaging summary in the excerpt field. This text often appears on your archive pages and can be used by search engines to summarize your page.

    5. Link Hygiene and External Destinations

    Internal and external links are crucial for providing additional context and building domain authority. However, broken links or poorly configured destinations can harm your credibility.

    • Internal Linking: Link to at least two or three other relevant articles on your own site to keep readers exploring your content.
    • Link Verification: Click on every link in your preview window to confirm they open the correct pages.
    • Opening Behavior: Set external links to open in a new tab so users do not completely leave your website when clicking on a reference.

    How to Automate Your WP Publishing Checklist with Editorial Tools

    A graphic depicting automated tools or a plugin interface streamlining a WordPress publishing checklist, showing efficiency and a robot or gear icon.
    A graphic depicting automated tools or a plugin interface streamlining a WordPress publishing checklist, showing efficiency and a robot or gear icon.

    Photo by Jotform on Unsplash

    While keeping a mental or paper-based list is a great start, relying entirely on memory can fall short during busy editorial cycles. This is why many professional newsrooms and content teams utilize technical solutions to enforce their editorial workflows. By utilizing specific plugins, you can programmatically prevent a post from being published if it does not meet your site's strict criteria.

    For example, specialized administrative tools can allow you to set minimum or maximum limits on word counts, enforce the use of categories, or require a specific number of tags. If a draft fails to meet these parameters, the system can restrict publishing privileges until the writer makes the necessary adjustments.

    To see how technology can assist you in streamlining this process, check out the specialized App developed to simplify publishing workflows. Using digital helpers removes the guesswork from editing, giving your team absolute peace of mind before every launch. If you have questions about setting up these configurations, you can explore the helpful Faq section for common troubleshooting tips.

    Publishing Workflow Element Manual Verification Automated Checklist System
    Taxonomy Rules Editors must visually check if categories and tags are assigned correctly. Automatically blocks publishing if category is missing or tag count exceeds limits.
    Length & Word Counts Writers must manually check the editor status bar for length and word count. Enforces strict minimum and maximum word count parameters before publication.
    Alt Text Verification Editors must click on every image to check for alternative text. Scans media block parameters and flags any missing descriptive text instantly.
    Process Efficiency High risk of oversight, especially when rushing to meet tight editorial deadlines. Standardizes the editorial gatekeeping process, eliminating human oversight errors.

    Printable Formatting and Checklist Template

    A clear photo of a printed checklist template on a desk, with checkboxes, ready for manual review before publishing content.
    A clear photo of a printed checklist template on a desk, with checkboxes, ready for manual review before publishing content.

    Photo by Markus Winkler on Unsplash

    If you prefer to have a tangible, easy-to-use guide next to you while editing, you can copy, paste, or print this simplified checklist. Use it as a final review protocol before making any post live to the public.

    Quick-Reference Pre-Publish Checklist

    • Headline: Is the title engaging, clear, and formatted as the only H1 tag on the page?
    • Heading Hierarchy: Do the subheadings follow a logical progression (H2 to H3 to H4)?
    • Paragraph Structure: Are text blocks broken up into readable chunks of 2-4 sentences?
    • Code Cleanliness: Has the text been pasted cleanly without importing bloated span tags or external inline styles?
    • URL Slug: Is the permalink short, lower-case, descriptive, and separated by hyphens?
    • Image Compression: Are all image files optimized and compressed for quick loading times?
    • Alt Text: Does every image have a helpful, descriptive alternative text attribute for accessibility?
    • Internal Links: Are there natural links pointing back to other helpful pages on your website?
    • External Links: Do external links open in a new tab so you do not lose your visitor's attention?
    • Taxonomy: Is the post assigned to one main category, and are tags used selectively?
    • Excerpt: Has a custom, compelling excerpt been written to encourage click-throughs?
    • Preview: Have you viewed the post in mobile and desktop preview modes to check the overall layout?

    Final Thoughts on Achieving Publishing Excellence

    Establishing a rigorous publishing protocol is one of the most effective ways to upgrade the professionalism of your website. While drafting content requires creativity and flow, publishing requires structure, attention to detail, and technical discipline. By holding your content to high structural and technical standards, you elevate your brand and ensure your audience receives the best possible reading experience.

    Whether you choose to follow a manual routine or implement automated plugins to enforce your guidelines, consistency is what separates successful websites from the rest. Take the time to implement these checks today, and watch your site's polish, readability, and search performance improve with every single post you share.