Tag: content creation

  • Boost Your Blog Writing Speed: The Ultimate Guide to Dictation for Blog Writing

    Boost Your Blog Writing Speed: The Ultimate Guide to Dictation for Blog Writing

    Boost Your Blog Writing Speed: The Ultimate Guide to Dictation for Blog Writing

    A person using a headset to dictate a blog post, with text appearing on a screen, symbolizing increased writing speed and productivity.
    A person using a headset to dictate a blog post, with text appearing on a screen, symbolizing increased writing speed and productivity.

    Photo by Markus Winkler on Unsplash

    Many content creators suffer from the dreaded "blank page syndrome." Staring at a blinking cursor for hours, trying to construct the perfect opening hook, is a universal struggle. In fact, research shows that writing a standard blog post using traditional keyboard typing takes an average of 4 hours and 10 minutes. This slow pace is rarely due to a lack of ideas; instead, it is caused by the physical bottleneck of typing and the constant urge to self-edit mid-sentence. By adopting dictation for blog writing, you can dismantle these mental barriers, bypass your inner critic, and drastically accelerate your content production pipeline.

    Speech-to-text technology has evolved from a clumsy novelty into a highly accurate, professional-grade productivity tool. If you are looking to increase your publishing frequency without sacrificing content depth, transitioning to a voice-first workflow is one of the most effective strategies available.


    The Raw Power of Speaking vs. Typing

    Most people type at an average rate of 40 words per minute (WPM). By comparison, natural speech flows comfortably at 120 to 150 WPM. This means your mouth can formulate and deliver ideas three to four times faster than your fingers can type them out on a keyboard.

    Split image showing a person typing rapidly on a keyboard on one side and a person speaking fluidly into a microphone on the other, illustrating speed difference.
    Split image showing a person typing rapidly on a keyboard on one side and a person speaking fluidly into a microphone on the other, illustrating speed difference.

    Photo by @felirbe on Unsplash

    When you sit at a keyboard, you are physically tethered to a desk. This static environment often invites distraction and fatigue. When you speak, however, your cognitive load is focused entirely on expression rather than the mechanics of spelling, punctuation, and layout. Transitioning to voice-to-text doesn't just make writing faster; it changes the tone of your writing. Spoken drafts naturally inherit a conversational, authentic rhythm that resonates deeply with blog readers, who generally prefer accessible, engaging language over stiff, academic prose.


    Traditional Typing vs. Voice Dictation

    To understand the practical efficiency of changing your methodology, consider how the two approaches compare across key performance and health metrics.

    Performance Metric Traditional Keyboard Typing Voice-First Dictation
    Average Drafting Speed 30–40 words per minute 120–150 words per minute
    First Draft Time (1,500 words) 120–180 minutes 15–30 minutes (actual speaking time)
    Physical Strain & Ergonomics High risk of wrist, back, and neck strain Low physical strain; allows movement and standing
    Primary Mental Hurdle Instant self-editing and perfectionism Overcoming vocal self-consciousness
    Editing Requirements Polished structure, but slower development Rapid drafting, requires structural cleanup

    Setting Up Your Workflow to Speed Up the Process

    To fully unlock the speed benefits of speaking your drafts, you need an organized system. If you try to dictate off the top of your head without preparation, you will likely end up with a disorganized transcript filled with run-on sentences, repetitive thoughts, and logical gaps.

    A highly efficient dictation workflow relies on three core phases:

    1. The Skeleton (Outlining): Never speak into a microphone without a roadmap. Spend ten minutes drafting a clear, detailed outline. Note your main headings, the core message of each section, and any specific data points you need to reference.
    2. A notepad or whiteboard with a clear outline for a blog post, showing headings and key points, representing the
      A notepad or whiteboard with a clear outline for a blog post, showing headings and key points, representing the

      Photo by Kelly Sikkema on Unsplash

    3. The Capture (Dictation): Find a comfortable environment, review your outline, and speak your mind freely. Do not pause to correct slips of the tongue, mispronounced words, or grammar errors. Keep your momentum moving forward.
    4. The Polish (AI-Assisted Editing): Run your raw audio transcript through an editing tool or an AI assistant to clean up the formatting, remove filler words, and polish the structure into a ready-to-publish blog post.
    5. A screen showing text being edited or polished by an AI assistant, highlighting corrections and improvements, symbolizing the
      A screen showing text being edited or polished by an AI assistant, highlighting corrections and improvements, symbolizing the

      Photo by Aerps.com on Unsplash

    Integrating speech seamlessly with your overall publishing strategy is a game-changer. To build a highly optimized workflow that scales, it helps to study other proven ways to speed up your blog writing process, ensuring that your transition to voice-to-text fits perfectly into your editing and publishing cycles.


    Choosing the Right Tools to Perfect Your Dictation for Blog Writing

    You do not need expensive, specialized equipment to start dictating. Most modern operating systems and mobile devices come equipped with built-in speech-to-text software that is remarkably accurate.

    Built-In Operating System Tools

    • Google Docs Voice Typing: Available for free inside the Google Chrome browser. It is highly accurate, adapts well to different accents, and supports basic voice commands for punctuation.
    • Apple Dictation & Windows Voice Typing: Built directly into macOS, iOS, and Windows. These tools allow you to dictate directly into any text field, making them highly versatile for drafting directly inside your blogging platform.

    Dedicated Mobile Apps and Transcription Software

    • Voice Memo & Recording Apps: Sometimes, the best writing happens when you are away from your computer. You can record a raw audio file on your smartphone while walking in a park, then upload the file to an automated transcription service like Otter.ai, Descript, or OpenAI's Whisper API.
    • Whisper-Based Tools: These advanced speech-to-text models can transcribe audio with incredible accuracy, easily handling background noise, accents, and technical jargon.

    For publishers managing content delivery platforms, like those powered by wp-publisher.com, the primary goal is getting high-quality text from your brain to the web with minimal friction. Consulting your platform's detailed platform documentation can help you discover how to import raw, transcribed text directly into your content management system without losing important formatting.


    Step-by-Step Guide: Mastering Dictation for Blog Writing

    Transitioning to a voice-first writing style requires a shift in habits. Follow this step-by-step blueprint to ensure your first dictated blog post is a success.

    Step 1: Optimize Your Environment and Hardware

    While built-in laptop microphones have improved, they easily pick up keyboard clicks and room echoes. For professional-grade dictation, use a dedicated external USB microphone or a high-quality headset with a noise-canceling mic. This ensures the speech-to-text engine catches every syllable, drastically reducing transcription errors.

    A close-up of a high-quality external USB microphone or a noise-canceling headset, indicating optimized hardware for dictation.
    A close-up of a high-quality external USB microphone or a noise-canceling headset, indicating optimized hardware for dictation.

    Photo by tirdad eshraq on Pexels

    Step 2: Prepare Your SEO Keywords

    One common challenge with dictation is ensuring your target search terms flow naturally. Before you hit record, write down your primary and secondary keywords on a sticky note or keep them visible on your screen. This visual prompt reminds you to speak these phrases naturally as you explain your points, rather than trying to awkwardly stuff them into your transcript during the editing phase.

    Step 3: Dictate in Chunks

    Do not try to dictate an entire 1,500-word article in one single, continuous stream. Instead, approach your draft section by section. Look at your first subheading, take a deep breath, and speak for two to three minutes on that specific topic. Once you have exhausted that point, pause, review the next subheading on your outline, and repeat the process.

    Step 4: Keep Moving Past Mistakes

    If you mispronounce a word or realize you phrased a sentence poorly, do not stop to correct it. Simply say the sentence again correctly and keep moving. Your editing phase will easily catch these repetitions, and stopping mid-flow ruins the cognitive momentum that makes dictation so fast.


    Overcoming the Learning Curve of Dictation for Blog Writing

    Speaking your thoughts out loud feels incredibly awkward at first. Most of us have been trained since childhood to write using our hands, whether with a pen or a keyboard. When you switch to speaking, you might find yourself stuttering, forgetting your train of thought, or feeling self-conscious.

    This is entirely normal. Dictation is a cognitive muscle that must be developed over time.

    To make the transition easier, start small. Do not try to write a massive, 3,000-word pillar post on your first day. Instead, begin by dictating short social media updates, email replies, or brief introductory paragraphs. As your brain adapts to translating thoughts directly into speech, you can gradually scale up to full-length outlines and detailed blog sections. Within two weeks of consistent practice, the awkwardness will fade, replaced by a fluid, conversational writing style.


    Using AI to Turn Transcripts into Polished Articles

    A raw voice transcript is rarely ready for immediate publication. It will inevitably contain verbal filler words ("um," "uh," "like"), redundant sentences, and minor grammatical quirks. Historically, cleaning up these transcripts manually took so much time that it offset the speed gains of dictation.

    Fortunately, modern generative AI tools have solved this problem. You can copy your raw, messy transcript and paste it into an AI assistant with a simple, direct prompt:

    "Clean up the grammar and punctuation of the following raw transcript. Remove any verbal fillers, repetitive phrases, and slang. Organize the text into logical paragraphs and insert clear headings. Make sure to preserve my natural, conversational tone and do not alter the core message."

    This simple automation step saves approximately 35–45 minutes per standard blog post on the first draft alone. It bridges the gap between the speed of speech and the polished structure required for professional online publishing.


    Health and Creativity Benefits Beyond Speed

    While the productivity gains are impressive, dictation also offers profound physical and creative advantages.

    Sitting at a desk for eight hours a day is physically taxing. It leads to poor posture, repetitive strain injuries like carpal tunnel syndrome, and chronic neck and back pain. Dictation breaks this physical lock. With a wireless headset or a smartphone recording app, you are free to stand up, stretch, or even pace around your home office while drafting your next masterpiece.

    Furthermore, physical movement is scientifically proven to boost creative thinking. Walking stimulates blood flow to the brain, helping you solve complex structural problems in your writing and generate unique analogies that might never have surfaced while staring blankly at a bright computer screen. By stepping away from the keyboard, you protect your body and unleash your full creative potential.

    A person walking outdoors or in a bright space while dictating, symbolizing how physical movement enhances creative thought.
    A person walking outdoors or in a bright space while dictating, symbolizing how physical movement enhances creative thought.

    Photo by Arek Adeoye on Unsplash

  • Fast Blog Post Editing Tips: Streamline Your Workflow for Quicker Publishing

    Fast Blog Post Editing Tips: Streamline Your Workflow for Quicker Publishing

    Fast Blog Post Editing Tips: Streamline Your Workflow for Quicker Publishing

    An illustration showing a person efficiently managing their blog writing and editing workflow on a laptop, with elements symbolizing speed and streamlined processes.
    An illustration showing a person efficiently managing their blog writing and editing workflow on a laptop, with elements symbolizing speed and streamlined processes.

    Photo by Nick Morrison on Unsplash
    Every blogger knows the feeling: you spend hours pouring your ideas onto the screen, only to realize that the hardest part of the process is still ahead. Editing can easily drag on longer than drafting itself, leading to publishing bottlenecks and frustration. However, learning how to clean up your drafts efficiently is the secret weapon of high-output content creators. By integrating specific fast blog post editing tips into your production routine, you can polish your drafts in a fraction of the time without sacrificing the quality search engines and readers demand. To truly optimize your workflow, it helps to combine structural editing strategies with smart writing habits, such as the ones found in our guide on strategies to accelerate your writing speed.

    In this comprehensive guide, we will break down actionable editing techniques designed to optimize your editorial process, clear your publishing backlog, and keep your content crisp, readable, and highly engaging.


    Why You Must Separate Writing and Editing

    A visual metaphor showing two distinct brains or halves of a brain, one labeled
    A visual metaphor showing two distinct brains or halves of a brain, one labeled

    Photo by Suzy Hazelwood on Pexels

    The single biggest mistake writers make is trying to edit while they write. Correcting typos, adjusting sentence structure, and second-guessing your word choices mid-draft is a cognitive trap. This habit forces your brain to constantly switch between two entirely different modes of thinking: the creative, generative phase (writing) and the critical, analytical phase (editing).

    When you write and edit simultaneously, you disrupt your creative flow state. This back-and-forth transitions your brain into a state of friction, causing what productivity experts call "directed attention fatigue."

    By contrast, decoupling these phases allows you to draft with momentum, knowing that you will polish the piece later. Give yourself permission to write a messy first draft. Once the ideas are safely on the page, you can transition into editing mode with a clear, focused mind, applying targeted editing workflows to refine the structure and tone.


    The Structural Pass: Fast Blog Post Editing Tips for Flow and Focus

    A blueprint or architectural drawing representing the structure and outline of a blog post, highlighting logical flow and organization.
    A blueprint or architectural drawing representing the structure and outline of a blog post, highlighting logical flow and organization.

    Photo by Amsterdam City Archives on Unsplash
    Once your draft is complete, do not jump straight to correcting punctuation. Instead, start with a high-level structural pass. This structural phase ensures that your post delivers on its promise, maintains a logical progression, and remains focused on the primary search intent.

    Adopt a Modular Editing Approach

    Rather than editing your article as one overwhelming wall of text, use a "chunking" method. Approach your blog post section by section, starting with your subheadings. Ensure that each H2 and H3 heading logically transitions to the next. If a section does not actively support the main topic of your post, it is a candidate for removal. Modular editing prevents you from getting bogged down in minor details before you have even established a solid structural foundation.

    Strip the Fluff and Tangents

    When writing a first draft, it is natural to over-explain concepts or drift into adjacent, off-topic ideas. During your structural pass, ruthlessly cut redundant paragraphs, repetitive phrases, and anecdotes that do not serve the reader. A tighter, more cohesive post keeps readers on the page longer and sharpens your overall value proposition. Instead of aiming for a specific word count, aim for maximum informational density.

    Stick to Proven Formatting Structures

    If you find yourself rearranging paragraphs repeatedly, you may have strayed from a clear organizational framework. Save editing time by utilizing simple, established structures such as "how-to" guides, listicles, or problem-and-solution formats. These frameworks keep your writing disciplined and make structural editing incredibly straightforward, as any section that breaks the established pattern will immediately stand out.


    Polishing the Page: Fast Blog Post Editing Tips for Better Readability

    Hands polishing a page of text with a cloth, making it shine and appear clear and easy to read, symbolizing improved readability and visual formatting.
    Hands polishing a page of text with a cloth, making it shine and appear clear and easy to read, symbolizing improved readability and visual formatting.

    Photo by Nadiia Ganzhyi on Unsplash
    Modern internet readers do not read word-for-word; they scan. If a visitor lands on your blog and is greeted by a dense block of text, they are likely to click away immediately. Your editing workflow must prioritize visual formatting and readability to accommodate mobile users and scanning readers.

    Break Up Walls of Text

    During your editing pass, look for paragraphs that exceed three or four sentences. Break these up into smaller, easily digestible chunks. White space is your friend—it gives the reader’s eyes a place to rest and makes the content feel highly accessible.

    Use Visual Signposts

    Incorporate formatting elements that guide the reader down the page. This includes:

    • Bullet points and numbered lists: Excellent for presenting sequences, step-by-step instructions, or itemized details without cluttering your narrative.
    • Bold text: Use bolding strategically to highlight key concepts, main takeaways, or action items. This allows scanners to extract the core value of your post in seconds.
    • Descriptive subheadings: Ensure your subheadings clearly communicate what the following section is about, rather than relying on vague or overly clever titles.

    The Final Polish: Fast Blog Post Editing Tips to Ensure Quality

    With your structure solid and your formatting optimized, it is time for the final polish. This phase is dedicated to catching spelling mistakes, awkward sentence structures, and subtle grammatical errors that might erode reader trust.

    Leverage the Power of the "Read Aloud" Technique

    A person speaking into a microphone while looking at a laptop screen, illustrating the
    A person speaking into a microphone while looking at a laptop screen, illustrating the

    Photo by Michał Parzuchowski on Unsplash
    When you read your own writing silently, your brain automatically fills in missing words and corrects typos because it already knows what you intended to say. Reading your draft out loud forces you to slow down and process every syllable. This technique is incredibly effective for identifying:

    • Clunky or overly long sentences that cause you to run out of breath.
    • Rhythmic issues and repetitive sentence beginnings.
    • Awkward phrasing that sounds unnatural.

    If you struggle to read a sentence smoothly, your reader will struggle to understand it. Rewrite it immediately for clarity.

    Utilize Automated Editing Tools

    A robot hand interacting with a computer screen displaying grammar and spelling check software, symbolizing the use of automated editing tools.
    A robot hand interacting with a computer screen displaying grammar and spelling check software, symbolizing the use of automated editing tools.

    Photo by Daniil Komov on Pexels

    Do not rely solely on your eyes to catch technical errors. Integrate automated spelling, grammar, and style checkers into your routine to handle the mechanical heavy lifting. Tools like Grammarly or Hemingway Editor can instantly flag passive voice, overly complex sentences, and common spelling mistakes. This automation allows you to focus your mental energy on high-level concerns like tone, clarity, and engagement.


    Traditional vs. Streamlined Editing Workflow

    To visualize how these strategies compress your timeline, let us look at how a streamlined approach compares to traditional, less efficient editing methods.

    Workflow Parameter Traditional Editing (Slow) Streamlined Editing (Fast)
    Cognitive Approach Editing while writing; stopping constantly to fix typos. Decoupled phases; drafting freely first, editing later.
    Process Direction Bottom-up (fixing commas before structuring ideas). Top-down (structural passes first, micro-polishing last).
    Formatting Applied as an afterthought, leading to manual adjustments. Built directly into the editing pass via headers and bold text.
    Proofreading Silent reading (prone to missing repetitive words). "Read aloud" technique and automated grammar sweeps.
    Time Investment High fatigue; often taking 2+ hours per draft. Low fatigue; completed in focused, 15–30 minute passes.

    Building an Efficient Editing Checklist

    To keep your speed consistent, compile a standardized checklist that you can run through before hitting publish. Having a structured routine ensures that you do not miss any critical steps while maintaining a high publishing velocity.

    • The Promise Check: Does the introduction immediately address the headline’s promise and outline the value the reader will receive?
    • The Structural Sweep: Are your H2 and H3 subheadings organized logically? Do they flow naturally from one point to the next?
    • The Readability Test: Are your paragraphs short and punchy? Have you used bullet points and bold formatting to aid scannability?
    • The Fluff Reduction: Have you removed redundant phrases, repetitive sentences, and off-topic tangents?
    • The Audio Review: Have you read the draft aloud (or used text-to-speech software) to verify the rhythm and natural flow of the prose?
    • The Link and Meta Check: Are all internal and external links functional and set to open correctly?

    To streamline your overall publication pipeline, consider managing your workflows on a unified system. For example, utilizing the publishing solutions at wp-publisher.com can help automate formatting, layout, and scheduling. If you need assistance configuring your site to support rapid content delivery, you can explore our detailed documentation resources to optimize your WordPress setup.


    Prioritizing Quality Over Quantity

    As you refine your editing workflow, keep in mind that speed should never come at the cost of value. Search engines and readers alike prioritize helpful, high-quality content over thin, error-prone posts. The goal of fast editing is not to cut corners, but to eliminate the friction and inefficiencies that slow your productivity down.

    By separating your drafting and editing phases, leveraging structured formatting, and following a repeatable checklist, you can consistently publish polished, high-impact blog posts in a fraction of the time. Implement these workflows today to make your content creation process simpler, faster, and far more rewarding.

  • How AI Content Ideation Can Revolutionize Your Blog’s Editorial Strategy

    How AI Content Ideation Can Revolutionize Your Blog’s Editorial Strategy

    How AI Content Ideation Can Revolutionize Your Blog's Editorial Strategy

    Every content creator knows the sinking feeling of staring at a blank document, waiting for inspiration to strike. The pressure to publish high-quality, relevant, and consistent blog posts can quickly turn brainstorming from a creative exercise into a stressful chore. If you find yourself recycling the same basic concepts or struggling to keep your content calendar full, you are not alone.

    A person staring frustratedly at a blank computer screen, symbolizing writer
    A person staring frustratedly at a blank computer screen, symbolizing writer

    Photo by Ajay Deewan on Unsplash
    The secret to breaking this cycle lies in shifting from manual brainstorming to AI content ideation. This modern approach combines programmatic pattern recognition with creative planning, allowing publishers to analyze vast amounts of data, uncover unexpected content angles, and map out structured outlines in a fraction of the time. By leveraging intelligent systems on your site, such as the digital publishing frameworks discussed on wp-publisher.com, you can transform how you plan, structure, and execute your blog strategy.


    The Evolution of AI Content Ideation: From Whiteboards to Algorithms

    Traditionally, blog brainstorming was a highly manual, subjective process. Creators relied on general Google searches, personal intuition, and messy whiteboards to map out what they thought their readers wanted. While this organic approach had its charms, it was often slow, limited by individual cognitive biases, and highly prone to "creative dry spells."

    The rise of generative AI and Large Language Models (LLMs) has changed the playing field. Instead of guessing what topics might resonate, creators can use machine learning to scan existing digital ecosystems, find semantic gaps, and generate comprehensive lists of fresh angles.

    An abstract representation of generative AI or a large language model, possibly showing data processing, neural networks, or a digital brain analyzing information.
    An abstract representation of generative AI or a large language model, possibly showing data processing, neural networks, or a digital brain analyzing information.

    Photo by Google DeepMind on Unsplash

    When you transition to automated brainstorming, you are not handing over the keys to your blog to a machine. Instead, you are using data-driven systems to rapidly expand your options. AI models excel at:

    • Semantic Association: Linking wildly different concepts to create unique, cross-disciplinary blog topics.
    • Audience Segmentation: Instantly tailoring a single core topic for multiple reader profiles (e.g., translating a technical concept into a guide for beginners vs. an advanced deep-dive).
    • Structural Efficiency: Turning a loose topic idea into a fully fleshed-out heading outline and writing brief in seconds.

    For content teams managing complex multi-author sites, integrating these capabilities directly into the content management system is becoming a necessity. If you want to see how these automated capabilities look in a real-world setup, you can check out this comprehensive WordPress writing assistant plugin overview to understand how modern creators run these workflows directly from their editing dashboard.


    SEO-Driven Strategy: Integrating AI Content Ideation with Keyword Data

    Great blog posts exist at the intersection of human interest and search engine visibility. One of the most powerful applications of AI in brainstorming is its ability to analyze search intent and group related concepts logically.

    A visual representation of SEO data, charts, and graphs intersecting with human interest concepts, showing the balance between user needs and search visibility.
    A visual representation of SEO data, charts, and graphs intersecting with human interest concepts, showing the balance between user needs and search visibility.

    Photo by Justin Morgan on Unsplash

    Instead of targeting a single, highly competitive keyword, modern tools help you build cohesive "topic clusters." By analyzing semantic relationships, an AI model can suggest a pillar page topic and generate a dozen supporting sub-topics that naturally build topical authority.

    Finding Content Gaps in Your Niche

    AI tools can quickly analyze competitor outlines to identify what they aren't talking about. By prompting an AI engine with top-performing articles from your competitors, you can ask it to find:

    1. Unanswered Questions: Critical reader concerns that competitors brushed past too quickly.
    2. Underserved Audiences: Niche segments of your industry that need specialized angles.
    3. Outdated Perspectives: Areas where industry changes have made old advice obsolete, giving you the perfect opportunity to publish updated guidance.

    How to Prompt for Originality in AI Content Ideation

    The biggest risk of using artificial intelligence for brainstorming is generic output. If you ask a standard chat model for "10 blog ideas about healthy eating," you will get back incredibly boring, predictable results like "The Benefits of Drinking Water" or "How to Eat More Vegetables."

    To get truly revolutionary ideas, you must master the art of prompt engineering. You need to give the AI a clear persona, constraints, and unique creative angles.

    A person
    A person

    Photo by Andres Siimon on Unsplash

    1. The Persona and Role-Play Prompt

    Always tell the AI who it is and who it is writing for.

    “You are an expert content strategist specializing in sustainable B2B supply chain management. Generate 5 contrarian blog topic ideas that challenge traditional shipping practices, specifically targeting enterprise operations managers who are skeptical of green initiatives.”

    2. The "Contrarian Angle" Framework

    Some of the most engaging blog content challenges conventional wisdom. Instruct the AI to take a stance that goes against the status quo in your industry.

    “In my industry, the standard advice is [Insert Standard Advice]. Give me 5 blog post angles that argue the exact opposite, supported by logical, real-world business scenarios.”

    3. The "Analogies and Metaphors" Prompt

    Complex topics can be difficult for general audiences to grasp. You can use AI to brainstorm creative metaphors to make your technical posts highly engaging.

    “I want to write a blog post explaining [Complex Technical Concept]. Brainstorm 5 unique real-world analogies (e.g., comparing it to cooking, architecture, or sports) that I can use as the core theme of the article.”


    Balancing Speed and Strategy: Avoiding Common AI Pitfalls

    While the speed of automated ideation is undeniable, relying on it blindly can hurt your brand's authority. To maintain high editorial standards, creators must be aware of the inherent limitations of these technical systems.

    Addressing the 12-Month Knowledge Gap

    Most large language models operate with static training datasets that have specific knowledge cutoff dates. This means they are often unaware of major industry shifts, new software updates, or cultural events that occurred within the last 12 months. If your blog relies heavily on real-time news, breaking trends, or cutting-edge technical updates, you must manually supply the AI tool with the latest context before asking it to brainstorm.

    Mitigating the Risk of Formulaic Content

    Because generative AI models predict the most likely next word based on historical data, their default output tends to favor the average. If you do not actively push the boundaries of your prompts, your blog feed will begin to look highly formulaic, dry, and indistinguishable from thousands of other sites on the web. Always treat AI-generated lists as a starting point—a raw block of marble that you must sculpt, refine, and inject with your unique brand voice.

    The Human-in-the-Loop Imperative

    A human editor carefully reviewing and refining content or ideas generated by an AI, emphasizing the essential human-in-the-loop process for quality and ethics.
    A human editor carefully reviewing and refining content or ideas generated by an AI, emphasizing the essential human-in-the-loop process for quality and ethics.

    Photo by Andres Siimon on Unsplash

    AI can suggest ideas, but it cannot verify their truthfulness or emotional resonance. "Hallucinations"—where an AI confidently invents false statistics, fake quotes, or nonexistent historical events—are a real issue.

    Every idea, outline, and brief generated by an AI tool must pass through a human editor. It is your job to ensure that the suggested angles align with your brand's ethics, offer genuine value, and contain factual data.


    Technical Integration: From Idea to CMS

    For professional publishers, the challenge is not just coming up with ideas, but keeping the editorial pipeline moving smoothly. Copy-pasting concepts back and forth between standalone AI chat windows, spreadsheets, and your blog's backend is incredibly inefficient.

    Ideally, your ideation workflow should look like this:

    [AI Ideation Session] ➔ [Human Review & Selection] ➔ [Automated Brief Generation] ➔ [CMS Drafting & SEO Optimization] 

    To build this setup, publishers utilize specialized tools and plugins that sit directly inside their writing environments. By integrating your brainstormer directly with your content management system, you can convert a validated concept into an active draft, assign meta tags, and map out heading structures in a single click.

    A clear workflow diagram showing the stages from AI ideation to human review, automated brief generation, and final CMS drafting and SEO optimization.
    A clear workflow diagram showing the stages from AI ideation to human review, automated brief generation, and final CMS drafting and SEO optimization.

    Photo by kenny cheng on Unsplash

    If you are looking to build a highly streamlined publishing system that connects these analytical tools with your website's database, you can refer to the official docs for step-by-step guidance on setting up professional publishing workflows.


    The Future of Creativity: Why Your Human Perspective Still Matters

    As the digital landscape becomes increasingly saturated with automated content, the value of true human experience is skyrocketing. Search engines and readers alike are learning to filter out thin, mass-produced text.

    The goal of utilizing AI content ideation is not to remove the human element from your blog, but to liberate it. By outsourcing the exhausting, time-consuming phase of initial research, categorization, and outline structuring to an intelligent helper, you free up your mental energy for what truly matters:

    • Lived Experience: Sharing personal anecdotes, case studies, and real-world experiments that a machine cannot replicate.
    • Original Opinions: Taking a bold stand on industry trends and providing genuine, thought-provoking commentary.
    • Relationship Building: Crafting deep, empathetic connections with your readers through authentic storytelling.

    When used correctly, artificial intelligence acts as a tireless collaborative partner, pushing you past creative roadblocks and helping you view your niche from entirely new angles. Embrace the technology as an amplifier for your creativity, and watch your blog's editorial process reach new heights of efficiency and impact.

  • How to Speed Up Technical Blog Writing: Streamline Your Developer Content Workflow

    How to Speed Up Technical Blog Writing: Streamline Your Developer Content Workflow

    How to Speed Up Technical Blog Writing: Streamline Your Developer Content Workflow

    A developer typing rapidly on a laptop keyboard, surrounded by digital elements representing code and blog post content, illustrating a streamlined and fast technical writing workflow.
    A developer typing rapidly on a laptop keyboard, surrounded by digital elements representing code and blog post content, illustrating a streamlined and fast technical writing workflow.

    Photo by WebFactory Ltd on Unsplash

    Technical writing is one of the most powerful career-building tools available to software engineers, developers, and technology enthusiasts today. Consistently publishing high-quality technical content not only solidifies your own understanding of complex concepts but also dramatically increases your industry visibility, with some top-tier technical blog posts gathering over 50,000 views and thousands of interactions. However, many developers find themselves staring at a blank screen for hours, struggling to balance the meticulous demands of writing code with the creative flow of drafting prose. If you want to remain consistent without burning out, learning how to speed up technical blog writing is the ultimate professional skill. By implementing structured workflows, leveraging advanced software tools, and focusing on incremental content production, you can scale your personal output while maintaining technical accuracy.
    Establishing a rapid, consistent writing system is the key to building audience trust and maintaining momentum. When you know how to streamline your technical publication schedule, you transition from a sporadic writer to an authoritative content creator. Let us explore the exact techniques, frameworks, and tools you can implement today to supercharge your technical blogging efficiency.


    Why You Need to Speed Up Technical Blog Writing to Build Your Career

    For many professionals, technical blogging is a bottleneck. It is easy to spend three full days researching, testing code blocks, writing explanations, and designing diagrams for a single post. While deep, exhaustive guides are valuable, a slow writing process limits your consistency. Consistency is the true engine of organic growth.

    A frustrated developer staring at a computer screen, with a metaphorical bottleneck symbol blocking their technical blog writing progress, representing a slow and difficult process.
    A frustrated developer staring at a computer screen, with a metaphorical bottleneck symbol blocking their technical blog writing progress, representing a slow and difficult process.

    Photo by Fikret tozak on Unsplash

    When you accelerate your writing process, you realize several direct benefits:

    • Compounded Learning: Writing forces you to articulate complex ideas clearly. The faster you write, the faster you solidify new technical concepts.
    • Higher Visibility: Publishing articles regularly keeps you top-of-mind for recruiters, peers, and potential clients.
    • Reduced Cognitive Friction: When writing becomes a highly structured, repeatable process rather than an unstructured creative hurdle, you are far less likely to procrastinate.

    To achieve this level of efficiency, you must treat your blog posts like software projects: break them down into modular components, automate repetitive tasks, and use optimized tools to handle the heavy lifting.


    Breaking the Blank Page: Efficient Ideation and Outlining

    The primary cause of writer’s block is trying to figure out what to write while you are trying to write it. Separating the ideation phase from the drafting phase is the most effective way to optimize your writing velocity.

    A developer looking pensive or frustrated at a blank text editor on a computer screen, symbolizing writer
    A developer looking pensive or frustrated at a blank text editor on a computer screen, symbolizing writer

    Photo by HackerNoon on Unsplash

    Maintain an Active Idea Backlog

    Never sit down to write without a pre-selected topic. Keep a lightweight backlog using tools like Notion, Trello, or a simple Markdown file in your code editor. Whenever you solve a unique bug, spend an hour debugging a configuration file, or learn a new syntax shortcut, write it down immediately.

    Start with "Small" Content

    You do not need to write a massive, 5,000-word architectural guide every week. In fact, byte-sized content based on personal, real-world challenges is often highly valuable to other developers who are searching for solutions to those exact problems. A 500-word post explaining how to fix a niche Docker configuration error is faster to write, highly practical, and much easier to draft quickly.

    Develop a Predictable Structure

    Most successful technical blog posts follow a highly predictable, standardized structure:

    1. The Hook & Problem: What problem are you solving? Why does it matter?
    2. The Solution Overview: A quick explanation of the high-level approach.
    3. The Step-by-Step Implementation: Clear code snippets accompanied by brief explanations.
    4. The Caveats/Gotchas: What should the reader look out for?
    5. The Conclusion: A brief wrap-up and a call to action.

    By adhering to this template, you remove the cognitive load of deciding how to structure your ideas, allowing you to focus entirely on filling in the blanks.


    Leveraging AI to Speed Up Technical Blog Writing Without Losing Authority

    Artificial intelligence tools can act as powerful force multipliers for technical writers, but they must be used strategically. Relying on AI to generate your entire article often results in generic, uninspired, and sometimes technically inaccurate content. Instead, treat AI as a highly capable drafting assistant.

    [Your Expertise & Code] ──> [AI Outlining & Structuring] ──> [Human Refinement & Testing] ──> [Polished Technical Post] 

    Use AI for Outline Generation and Brainstorming

    Provide your AI assistant with raw code blocks, notes, or bullet points, and ask it to generate a clean Markdown outline. This quickly builds the structural skeleton of your post. For instance, you can prompt the AI: "I want to write a blog post about configuring Redis caching in Node.js. Here is my working code block. Generate a structured outline with logical steps."

    A clear flowchart illustrating the AI-assisted technical writing process:
    A clear flowchart illustrating the AI-assisted technical writing process:
    ‘AI Outlining & Structuring’ -> ‘Human Refinement & Testing’ -> ‘Polished Technical Post’.” class=”auto-inserted-image rounded-lg shadow-md” style=”max-width: 100%; height: auto; display: block; margin: 0 auto;” />

    Photo by JK on Unsplash

    Use AI to Rewrite Clunky Sentences

    When writing drafts quickly, you will inevitably write sentences that feel awkward or wordy. Rather than stopping your writing flow to edit, keep writing. Once your draft is complete, copy and paste those specific paragraphs into an AI tool or use extensions like Grammarly to refine the tone, grammar, and flow in seconds.

    Keep the "Human in the Loop"

    Your personal experience, hard-won insights, and unique voice are what make your blog valuable. AI cannot replicate your specific debugging journey or the distinct architectural choices you made on a real-world project. Always review and verify every line of code generated or suggested by AI to ensure it is secure, optimal, and correct.


    Workflow Optimization: Before and After

    To see how restructuring your approach saves time, consider the differences between a traditional, unoptimized writing process and an accelerated, systemized workflow.

    Writing Stage Traditional Manual Process Optimized Accelerated Process Est. Time Saved
    Topic Selection Staring at a blank screen; deciding what to write on the spot. Selecting a pre-validated topic from an active backlog. 1.5 Hours
    Outlining Writing freestyle without structure, leading to scope creep. Following a standardized, AI-assisted outline skeleton. 1 Hour
    Drafting Process Writing, self-editing, formatting code, and proofreading simultaneously. The "First Draft Flow": writing continuously without stopping to edit. 2 Hours
    Code Formatting Manually styling snippets and configuring syntax highlighting. Using Markdown automation, snippet managers, and templates. 1 Hour
    Editing & Polishing Rereading the draft multiple times, manually looking for grammatical errors. Running automated style-guide checkers and grammar assistants. 1.5 Hours

    The Best Tools to Speed Up Technical Blog Writing and Formatting

    Using the right tools can make the difference between a writing session that takes all afternoon and one that is completed in an hour. By building a streamlined toolchain, you can eliminate manual formatting tasks.

    Markdown Editors and Snip Managers

    Writing in plain text Markdown is the gold standard for technical content. Editors like VS Code, Obsidian, or Typora allow you to write prose in the same environment where you write your code.

    A screenshot or illustration of a code editor like VS Code or Obsidian, showing a Markdown file with technical content and possibly a snippet manager interface in use.
    A screenshot or illustration of a code editor like VS Code or Obsidian, showing a Markdown file with technical content and possibly a snippet manager interface in use.

    Photo by anshul kumar on Pexels

    • Use snippet managers (like ESPanso or VS Code Snippets) to instantly insert common Markdown structures, warning callouts, or front-matter metadata blocks.
    • Keep your code snippets organized. Instead of rewriting code from scratch, pull directly from tested GitHub repositories or gists.

    Automated Publishing and Deployment

    Manually copying and pasting your Markdown files into a Content Management System (CMS) or web editor wastes valuable time. Look for automated publishing pipelines. For developers managing their own sites, setting up GitHub Actions to deploy static Markdown files directly to platforms like Jekyll, Hugo, or automated publishing systems ensures that your content goes live the moment you push to your main branch.

    A diagram showing an automated publishing and deployment pipeline, with content flowing from a Markdown editor through GitHub Actions to a static site or CMS, symbolizing efficiency.
    A diagram showing an automated publishing and deployment pipeline, with content flowing from a Markdown editor through GitHub Actions to a static site or CMS, symbolizing efficiency.

    Photo by Yancy Min on Unsplash

    If you are using custom publishing frameworks, make sure to refer to the relevant technical documentation to set up seamless build triggers and headless CMS pipelines. If you have questions about how these pipelines integrate with custom APIs, you can reference our frequently asked questions page to explore typical setups.


    Finding Your Niche: How to Write About What You Know, Faster

    One of the biggest speed traps in technical writing is trying to write about topics where you lack hands-on experience. This forces you to spend hours researching, verifying basic facts, and double-checking details.

    To dramatically increase your writing speed, focus heavily on your immediate sphere of competence:

    • The "Today I Learned" (TIL) Method: Did you spend two hours resolving a React dependency conflict today? Document it. You already understand the problem, the context, and the solution. The research is already complete.
    • Document Your Existing Projects: Instead of inventing artificial scenarios, write a post-mortem or walkthrough of a project you recently built. You can easily pull the actual code blocks directly from your working repository.
    • Repurpose Code Comments: If you wrote comprehensive docstrings or internal documentation for your team, you have already completed the hard work of explaining how the system works. Repurpose those explanations into a structured public post.

    Leveraging Developer Platforms for Maximum Reach

    While maintaining a self-hosted personal portfolio or company blog is highly recommended for building long-term search engine authority, you do not have to rely solely on organic search to build an audience.

    Platforms like Dev.to, Hashnode, and Medium have massive, built-in communities of developers looking for technical insights. Syndicating your content to these platforms can provide immediate editorial feedback, developer comments, and wider reach. When syndicating, always make sure to set the canonical URL back to your original blog post. This ensures that search engines recognize your personal site as the primary source of the content, preserving your SEO value while allowing you to enjoy the traffic benefits of community platforms.


    Conclusion: Build Your System Today

    Accelerating your writing process is not about cutting corners or releasing low-quality, AI-generated spam. It is about removing the operational bottlenecks that stand between your technical knowledge and a blank text document.

    By building a robust idea backlog, utilizing AI for structural outlines, drafting in a distraction-free Markdown environment, and automating your publishing workflows, you can drastically reduce the friction of content creation. Start small: write a 500-word post on a simple programming solution this week. Once you experience the efficiency of a streamlined writing pipeline, publishing technical content will shift from a chore into a seamless, rewarding extension of your daily development routine.

  • The Ultimate Guide to Efficient Blog Post Research Methods

    The Ultimate Guide to Efficient Blog Post Research Methods

    The Ultimate Guide to Efficient Blog Post Research Methods

    We have all been there: you sit down to write a comprehensive blog post, and within fifteen minutes, your browser is a crowded maze of ten, twenty, or even thirty open tabs. You have academic PDFs, industry reports, competitor articles, and statistical databases all vying for your attention. This phenomenon, often called "tab chaos," quickly leads to cognitive overload and decision paralysis.

    While some niche bloggers report spending up to eight hours researching a single, highly technical blog post, this massive time investment is rarely sustainable or necessary. On the other end of the spectrum, lifestyle, food, and travel writers often eschew heavy desk research entirely, relying on intuition, personal experience, and rapid trend checks to produce highly engaging content.

    The secret to scaling your content production without sacrificing quality lies in developing a structured, time-efficient research workflow. By transforming how you find, evaluate, and organize information, you can slash your preparation time in half and write more authoritative articles.


    Diagnosing "Tab Chaos" and Research Fatigue

    The primary reason blog research takes so long is that most writers research and write simultaneously. When you search for information as you write, you constantly interrupt your creative flow to verify facts, look up definitions, or find supporting statistics.

    This approach leads to several major productivity bottlenecks:

    • Cognitive Overload: Managing 10 to 20 open tabs forces your brain to constantly switch contexts, draining your mental energy before you even write your first paragraph.
    • Person
      Person
    • Information Hoarding: Out of fear of missing a crucial detail, writers often bookmark dozens of pages they will never actually read, stalling progress.
    • Lack of Direction: Without a clear plan, searching the web becomes an aimless journey down endless rabbit holes, turning a quick search into a multi-hour distraction.

    To write efficiently, you must treat research and writing as two entirely separate phases. Once you separate information gathering from content creation, you can streamline your process using a professional publishing workflow. For creators looking to manage their production pipeline seamlessly, utilizing a platform like wp-publisher.com can help bridge the gap between organized research and final publication.

    Workspace clearly divided into a
    Workspace clearly divided into a

    Phase 1: Establish Your Direction Before You Search

    The most efficient way to research is to know exactly what you are looking for before you open a single browser tab. Instead of letting Google dictate the structure of your article, you should establish a clear direction based on your target audience's needs.

    Identify the Core Search Intent

    Before conducting any external research, ask yourself what specific problem your reader is trying to solve. Are they looking for a quick tutorial, a deep-dive conceptual explanation, or practical tips? Aligning your content with this single intent ensures you only collect information that directly serves your reader, allowing you to ignore irrelevant background data.

    Map Out a Preliminary Structure

    Before searching the web, jot down a rough outline of the headings you expect to cover based on your existing knowledge. This preliminary outline acts as your research compass. If you know you need a statistic to support Section A and a real-world example to illustrate Section B, you can search for those specific elements directly, ignoring the temptation to read entire articles from start to finish.

    Using a structured system like the WP Publisher App allows you to organize these initial content ideas and structural headers in a clean, distraction-free environment before you start gathering your sources.


    Phase 2: Targeted Information Gathering

    Once you have your preliminary structure, you can begin gathering your source material. The goal here is speed and precision, keeping your browser clean and your focus sharp.

    Practice Skimming over Reading

    When you open a potential source, do not read it word-for-word. Instead, skim the text by looking at:

    Eye quickly scanning a digital document, highlighting headings and bolded terms.
    Eye quickly scanning a digital document, highlighting headings and bolded terms.
    1. Headings and Subheadings: These tell you if the article covers the specific points in your outline.
    2. Bolded Terms and Bullet Points: Authors highlight their most important takeaways here.
    3. Introductions and Conclusions: These sections usually summarize the main arguments, saving you from reading the entire body copy if the source is not a perfect fit.

    Keep a Low Tab Profile

    To maintain mental clarity, try to keep your active browser tabs to a minimum. Only keep tabs open if you are actively extracting information from them. The moment you find the statistic, quote, or fact you need, copy it into your research document along with the source URL, and close the tab immediately. This prevent "tab hoarding" and keeps your desktop organized.


    Phase 3: Synthesizing and Organizing Your Research

    Once you have collected your raw data, statistics, and expert quotes, you must synthesize this information into a cohesive outline.

    Scattered research notes, links, and data being organized into a cohesive structure.
    Scattered research notes, links, and data being organized into a cohesive structure.

    Centralize Your Notes

    Never leave your research scattered across bookmarks or open browser windows. Instead, paste all your notes, links, and thoughts into a single master document. Group your findings under the specific headings you planned during Phase 1. This turns the drafting process into a simple "fill-in-the-blank" exercise. You can read more About how modern digital publishers structure their content pipelines to maintain efficiency and consistency across multiple articles.

    Handle Contradictory Claims Transparently

    It is common to find conflicting statistics or opposing viewpoints during your research. Rather than ignoring these contradictions or spending hours trying to prove which one is universally correct, address them openly in your post.

    If two reputable industry studies offer differing statistics, briefly present both perspectives and link directly to the source with the stronger methodology. This transparency not only saves you research time but also builds trust with your readers by demonstrating that you have thoroughly evaluated the topic.


    Niche Adaptations: Tailoring Your Research Workflow

    Research requirements vary wildly depending on your blog's industry. Tailoring your depth of research to your specific niche is key to maintaining a highly productive schedule.

    Experiential and Creative Blogs

    For lifestyle, travel, fashion, or food blogs, intensive external research is rarely necessary and can actually dilute your unique voice. Readers visit these blogs for personal experiences, unique recipes, and practical advice. For these niches, limit your research to quick keyword checks to see what terms your audience uses, and focus the rest of your energy on original photography, personal storytelling, and clear, step-by-step instructions.

    Technical and Highly Regulated Blogs

    If you write about finance, medicine, psychology, or software engineering, your research must be rigorous and accurate. However, you can still remain highly efficient by focusing primarily on primary sources, such as peer-reviewed journals, official government databases, and whitepapers. Avoid relying on third-party blog summaries, which often misinterpret data and force you to spend extra time double-checking their work. Go straight to the source, copy the core data, and translate it into clear terms for your readers.


    Transitioning from Research to Writing

    The final step in an efficient research methodology is knowing when to stop. Research is a form of productive procrastination; it is easy to convince yourself that you need "just one more source" before you can start writing.

    Person closing browser tabs, preparing to start writing in a new document.
    Person closing browser tabs, preparing to start writing in a new document.

    Set a firm time limit for your research phase. Once your time is up, close your browser entirely, open your master document containing your organized notes, and begin writing. By drafting your post using only your compiled notes rather than constantly toggling back to active web pages, you will write faster, maintain a consistent voice, and avoid accidental plagiarism.


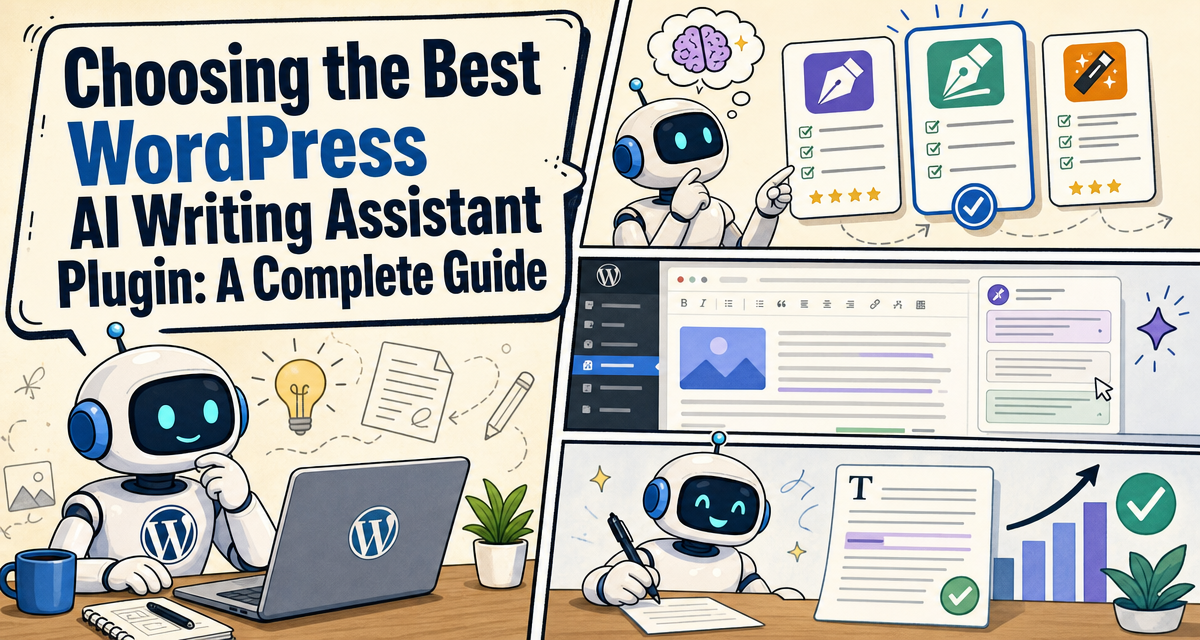
  • Choosing the Best WordPress AI Writing Assistant Plugin: A Complete Guide

    Choosing the Best WordPress AI Writing Assistant Plugin: A Complete Guide

    Choosing the Best WordPress AI Writing Assistant Plugin: A Complete Guide

    The demands on modern content creators, bloggers, and web developers are higher than ever. To maintain a competitive edge, publishing consistent, high-quality content is no longer optional—it is a baseline requirement. However, the traditional writing process, which involves bouncing between external drafting apps, spelling checkers, research tabs, and your content management system, can severely fragment your workflow.

    This is where a dedicated WordPress AI writing assistant plugin changes the game. By embedding artificial intelligence directly into your WordPress dashboard, these plugins bridge the gap between ideation and publication. Instead of relying on bulk, generic text generators that produce robotic articles, modern AI assistants work alongside you inside your editor, helping you refine your prose, design clean layouts, and optimize your writing in real time.


    What is a WordPress AI Writing Assistant Plugin and How Does It Work?

    A WordPress AI writing assistant plugin is a software extension that integrates directly with your website's editor—primarily the Gutenberg block editor, but often extending to other editing environments. Unlike standalone software-as-a-service (SaaS) copywriting tools that require you to copy and paste text back and forth, these plugins live where your content is born.

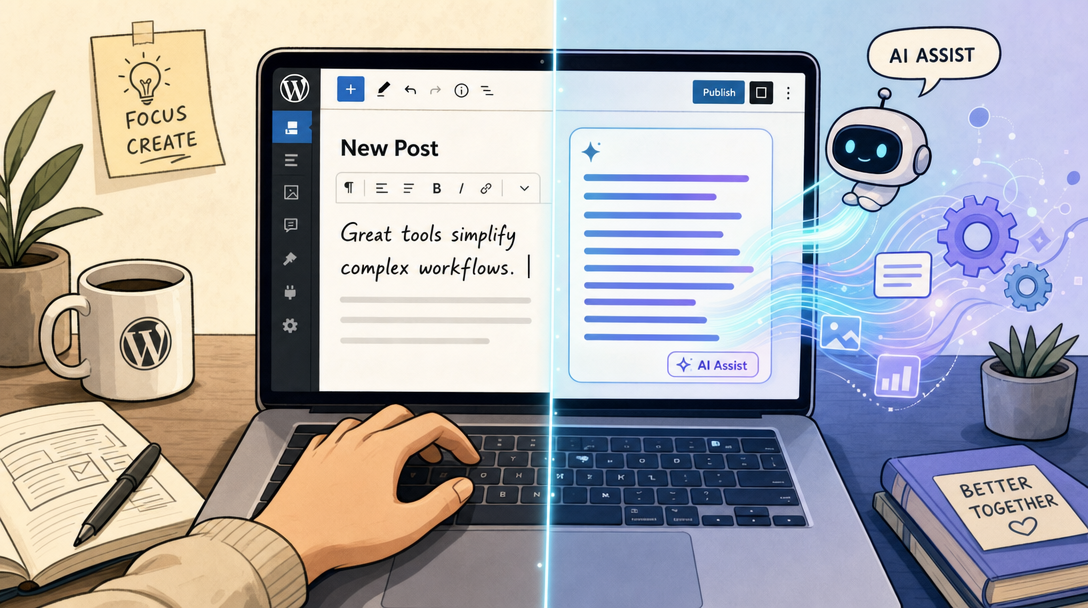
    AI assistant helps a writer create content within the WordPress editor.
    AI assistant helps a writer create content within the WordPress editor.

    Seamless Dashboard Integration

    When you install an AI assistant, it becomes a native part of your writing environment. If you use the standard Gutenberg editor, the AI assistant usually manifests as a block type or an inline contextual menu. As you highlight a sentence or insert a new block, you can prompt the AI to expand your thoughts, simplify complex vocabulary, translate text, or adjust your tone.

    This native positioning minimizes context switching. You no longer have to leave your tab to verify grammar, rewrite a clumsy sentence, or generate a structured list. Everything happens natively, allowing you to maintain your creative momentum. For creators looking to optimize their overall publishing workflow, leveraging platforms like wp-publisher.com can make content distribution seamless.

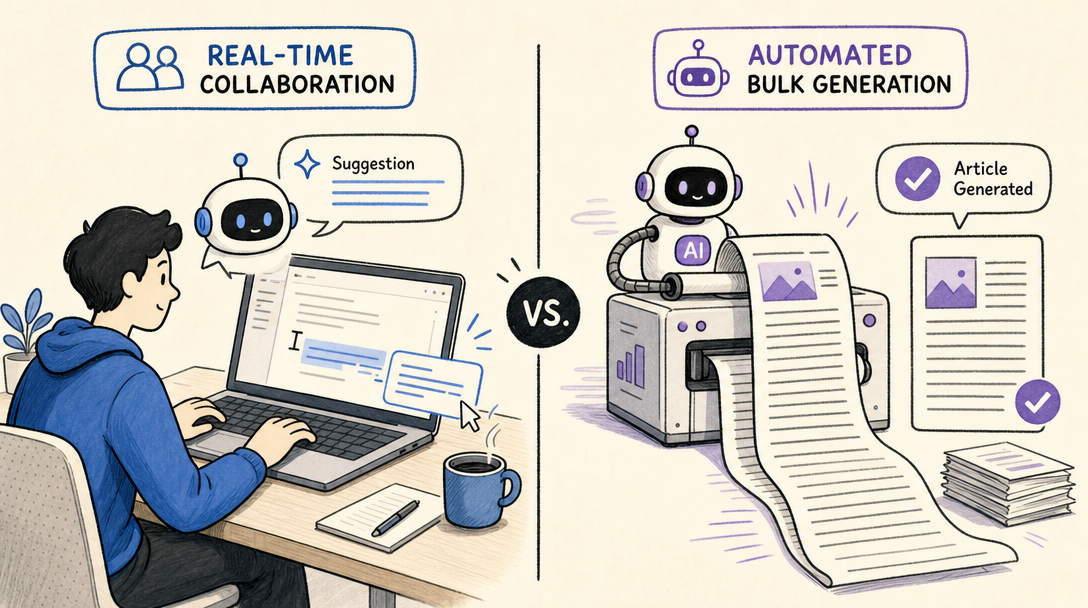
    Interactive "As-You-Write" Assistance vs. Bulk Generation

    It is important to understand the structural difference between an interactive AI assistant and a bulk article generator:

    Interactive AI writing and bulk AI content generation shown side-by-side.
    Interactive AI writing and bulk AI content generation shown side-by-side.
    • Bulk Generators: These tools typically require a single prompt or keyword and spit out a fully formed, multi-paragraph article. While fast, the output often lacks a cohesive human voice, requires heavy editing, and risks feeling detached or repetitive.
    • Interactive Writing Assistants: These plugins act as digital co-writers. They listen to your inputs block-by-block. If you are struggling with a transition paragraph, the assistant can suggest the next logical sentence. If a paragraph is too dense, it can rewrite it for better readability. They are designed to support and elevate your unique perspective rather than replace it entirely.

    Top WordPress AI Writing Assistant Plugins Compared

    The ecosystem of AI plugins is expanding rapidly, with different developers taking unique approaches to integration, cost control, and model support. Understanding the strengths of the leading options can help you select the tool that best fits your creative process.

    Jetpack AI Assistant

    Jetpack is one of the most widely used plugin suites in the WordPress ecosystem, and its native AI Assistant brings powerful text and formatting capabilities directly into the Gutenberg block editor.

    Because Jetpack is deeply integrated with the core block system, its assistant is exceptionally good at structural tasks. It does not just write paragraphs; it can build structured data tables, create custom forms, and generate relevant post images on the fly. This makes it a highly visual assistant that helps you build rich media posts without needing external graphic design or data formatting tools.

    WP Wand

    For creators who want ultimate control over the underlying artificial intelligence models powering their site, WP Wand offers a highly flexible approach. Instead of tying you to a single proprietary system, WP Wand allows users to connect their own API keys from top-tier AI providers.

    This plugin supports connections to OpenAI, Anthropic (Claude), OpenRouter, and DeepSeek. By inputting your personal developer key, you bypass the marked-up subscriptions of typical SaaS tools and pay the raw processing costs directly to the AI providers. It also features robust translation options and prompt frameworks designed to guide your writing seamlessly from draft to polished piece.

    Key Features and Models At a Glance

    To make the differences clearer, let us compare how these leading approaches stack up in terms of integration, model flexibility, and overall strengths:

    Plugin Name Primary Editor Integration Supported AI Models Key Strengths Pricing Structure
    Jetpack AI Assistant Native Gutenberg Blocks Proprietary & Partner Models Seamless block formatting (tables, forms, images) Free tier / Paid plans from $4.95/month
    WP Wand WordPress block editor OpenAI, Claude, OpenRouter, DeepSeek Multi-model API flexibility, extreme cost control Freemium (Use your own API keys)
    Generic API Connectors Gutenberg & Classic Editor OpenAI / Custom endpoints Direct LLM communication, zero subscription fees Pay-per-use via developer accounts

    API-Based Plugins vs. SaaS Subscriptions: A Cost Analysis

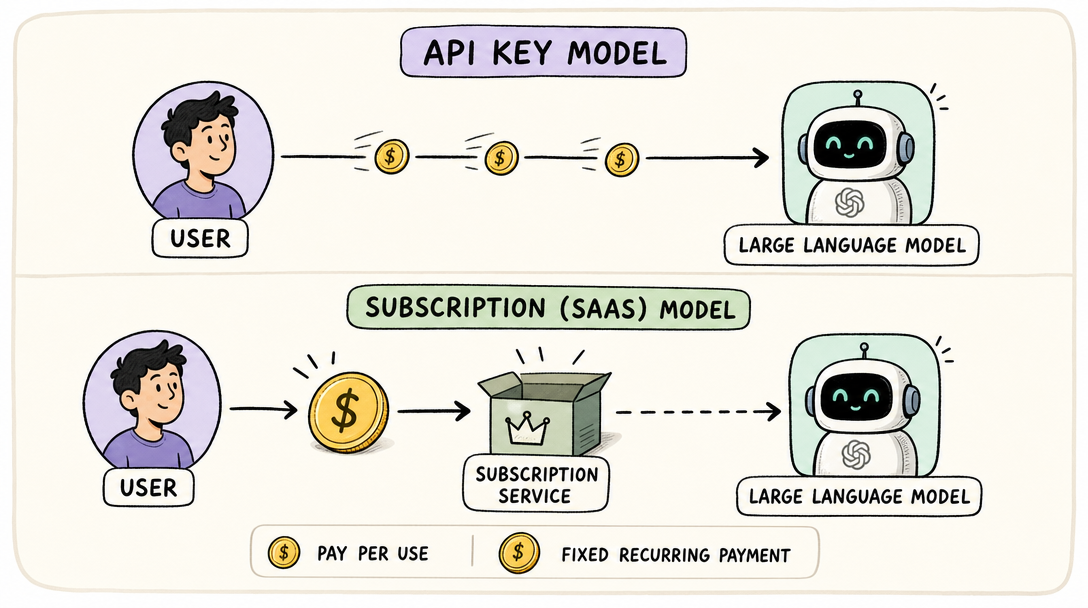
    One of the most important decisions you will make when choosing a WordPress AI writing assistant plugin is how you pay for the underlying artificial intelligence. The market is split into two primary business models: traditional SaaS subscriptions and direct API integrations.

    Two payment models for AI plugins: direct API versus monthly subscription.
    Two payment models for AI plugins: direct API versus monthly subscription.

    The SaaS Subscription Model

    Under a subscription model, you pay a flat monthly or annual fee directly to the plugin developer or an external service. For example, Jetpack AI Assistant offers a promotional tier starting at $4.95 per month, which eventually transitions to standard renewal pricing.

    The primary benefit of this model is simplicity. You do not have to set up developer accounts, manage billing keys, or worry about fluctuating costs based on your monthly word count. You pay a predictable fee and get a set amount of usage, making it ideal for casual bloggers or small business owners who value convenience above all else.

    The Direct API Key Model

    For high-volume publishers, agencies, and web developers, the direct API key model is highly efficient. Plugins like WP Wand let you generate your own API credentials directly from providers like OpenAI or Anthropic and paste them into your plugin settings.

    When you write using your own API key, you bypass the middleman. Instead of paying a flat $50 per month to an external writing platform, you pay fractions of a cent per word directly to the AI provider. Under this pay-as-you-go structure, drafting a comprehensive, well-structured article often costs just a few cents in raw API usage. If you are unsure about how AI credits or API keys translate to your dashboard, reviewing a comprehensive frequently asked questions page can clarify how these integrations operate.


    How to Use an AI Assistant to Improve Post Readability and Formatting

    Creating content that ranks well and keeps visitors on your page requires more than just correct spelling. Your posts must be highly readable, logically structured, and engaging. A quality AI assistant serves as a direct editorial coach to help you reach these benchmarks.

    Improving Sentence Structure and Readability

    Long, run-on sentences and dense academic jargon can cause readers to click away from your site. An inline AI assistant can instantly scan your text to identify readability bottlenecks.

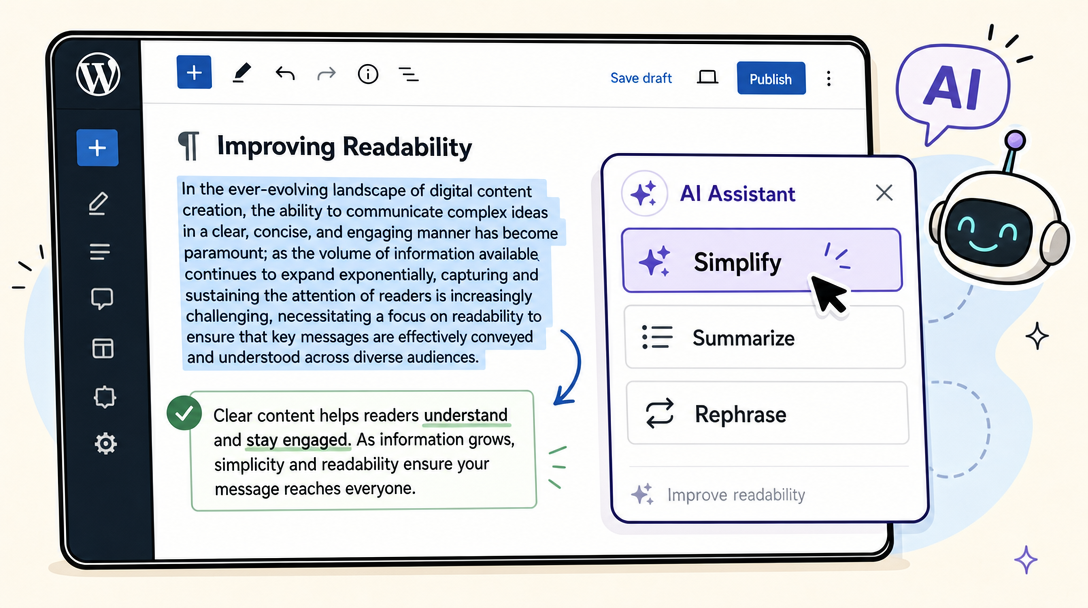
    By highlighting a complex passage, you can instruct the assistant to "simplify" or "summarize." The AI will break up long sentences, substitute passive voice with active verbs, and suggest bullet points to make the information highly digestible. This immediate feedback loop helps you maintain a high readability score throughout your writing process.

    AI assistant simplifies highlighted text within a WordPress editor screen.
    AI assistant simplifies highlighted text within a WordPress editor screen.

    Generating Structural and Media Elements

    Great blog posts are not just walls of text; they use visual cues to guide the reader's eye. Advanced assistants can handle these layout challenges natively:

    • Structured Tables: If you are listing product specifications, pricing tiers, or comparison metrics, you can ask the assistant to format that data into a clean, responsive table.
    • Pre-filled Forms: For lead generation or reader feedback, some advanced tools can generate functional form blocks tailored to the context of your post.
    • Post Images: Visual search is crucial. Integrated AI image generators can construct relevant visual elements that match the tone and topic of your written content, keeping users on your page longer.

    Best Practices for Writing Safely with AI in WordPress

    As helpful as AI writing assistants are, relying too heavily on automated generation carries distinct risks. To ensure your website maintains its search engine visibility and builds long-term trust with your audience, you must follow a balanced, responsible approach to AI integration.

    Human writer diligently edits and fact-checks AI-generated content.
    Human writer diligently edits and fact-checks AI-generated content.

    Keep a "Human-in-the-Loop"

    The single most important rule of working with artificial intelligence is to never publish raw, unedited AI content. Your audience visits your site for your unique insights, personal experiences, and distinct perspective.

    Use your WordPress AI writing assistant plugin to handle the heavy lifting of drafting, researching, structuring, and brainstorming. Once the initial draft is complete, step in as the primary editor. Inject your personal anecdotes, verify the tone, and ensure that the finished piece reads like it was written by a real human expert. Many developers prefer managing their publishing schedules on a dedicated publishing application to ensure cross-platform consistency.

    Rigorous Fact-Checking

    Large language models do not "know" facts; they predict the next most logical word based on patterns in their training data. This means they are prone to "hallucinations"—confidently stating incorrect dates, historical facts, scientific statistics, or technical instructions.

    Before hitting publish, verify every statistic, claim, and source link generated by your AI tool. A single unverified claim can damage your brand's authority and alienate your readership.

    Respecting Data Privacy and Security

    When you use an AI plugin, your draft content is sent to third-party servers (like OpenAI or Anthropic) for processing. If you are drafting highly sensitive business reports, proprietary product announcements, or personal client details, review the data usage policies of both your plugin and your API provider. Ensure that your inputs are not being utilized to train public machine learning models without your explicit consent.


    Elevating Your Content Strategy

    Integrating a WordPress AI writing assistant plugin into your website is one of the most effective ways to scale your content output without sacrificing quality. Whether you choose a native, all-in-one system like Jetpack AI to format beautiful blocks, or opt for an open-ended API tool like WP Wand to keep your operational costs low, these assistants act as valuable partners in the creative process.

    By combining the structural efficiency of artificial intelligence with your personal expertise, research, and unique editorial voice, you can produce highly readable, deeply engaging content that resonates with readers and stands out across the web.

    Related reading

  • How to Speed Up Your Blog Writing Process: The Ultimate Guide to High-Quality Content in Less Time

    How to Speed Up Your Blog Writing Process: The Ultimate Guide to High-Quality Content in Less Time

    How to Speed Up Your Blog Writing Process: The Ultimate Guide to High-Quality Content in Less Time

    Staring at a blank white screen while a cursor blinks mockingly is a rite of passage for almost every content creator. You know what you want to say, but the journey from a vague mental concept to a polished, published blog post often feels like an uphill battle. It is easy to spend five, six, or even eight hours agonizing over a single article, only to feel exhausted and behind schedule.

    A person with a look of mild frustration sits at a desk, staring at a blank computer screen with a prominent, blinking cursor.
    A person with a look of mild frustration sits at a desk, staring at a blank computer screen with a prominent, blinking cursor.

    But producing great content does not have to be a slow, painful crawl. Speeding up your writing process is not about cutting corners, lowering your editorial standards, or typing at a frantic pace. Instead, it is about designing a highly efficient system that removes friction, eliminates decision fatigue, and lets your thoughts flow naturally.

    By restructuring your workflow, utilizing modern tools, and adopting a systematic approach, you can dramatically reduce the time spent on every article while maintaining—or even improving—the quality of your output.


    The Core Philosophy: Separating Creation from Editing

    The single biggest obstacle to writing speed is trying to write and edit at the exact same time. When you pause after every sentence to fix a typo, search for a better synonym, or reorganize a paragraph, you constantly disrupt your mental momentum.

    Think of your brain as having two entirely distinct modes: the creator and the editor.

    An illustration depicting two distinct figures: one, a creative, energetic
    An illustration depicting two distinct figures: one, a creative, energetic
    • The Creator is intuitive, fast-paced, and focused on generating ideas, finding connections, and getting concepts down on paper.
    • The Editor is analytical, structured, and focused on polishing, formatting, grammar, and style.

    When you try to run both modes simultaneously, they clash. You write a sentence, your inner editor criticizes it, you delete it, and you are right back where you started. To speed up your blog writing process, you must completely separate these two phases.

    During your drafting phase, commit to writing continuously without looking back. If you make a spelling mistake, leave it. If you realize a paragraph could be structured better, make a quick note to fix it later and keep moving forward. By giving yourself permission to write a messy first draft, you unlock a state of flow that allows words to hit the page much faster.


    Step-by-Step Blueprint to Accelerate Your Writing Workflow

    To turn content creation into an efficient system, you should break the process down into discrete steps. When you sit down with a clear roadmap, you never have to wonder what to do next.

    1. Maintain a Rolling Idea Bank

    Never sit down to write without knowing what you are going to write about. Deciding on a topic on the fly is a major source of writer's block. Instead, maintain a dedicated digital document, spreadsheet, or notes app to serve as your idea bank. Whenever inspiration strikes—whether you are reading an article, listening to a podcast, or talking to a client—add it to the list. When it is time to write, simply choose a pre-approved topic from your bank and start immediately.

    2. Build a Detailed Outline Before Writing

    An outline is the architectural blueprint of your article. Writing without an outline is like trying to build a house without a plan; you will likely get lost, lose focus, and waste hours backtracking.

    An architectural blueprint is superimposed over a building under construction, with drafting tools nearby, symbolizing an article
    An architectural blueprint is superimposed over a building under construction, with drafting tools nearby, symbolizing an article

    Before drafting, spend 10 to 15 minutes mapped out your main headers (H2s and H3s) and adding a few bullet points under each. This breaks a daunting word-count goal into tiny, highly manageable sub-sections. When you start drafting, you only have to focus on writing one small section at a time.

    3. Write the Body Paragraphs First

    Many writers get stuck on the introduction. They spend an hour trying to craft the perfect hook before they have even written the meat of the article.

    You can bypass this bottleneck entirely by writing your body sections first. It is much easier to write an engaging introduction and a strong conclusion once you know exactly where the article ended up and what points were made.

    4. Craft Your Hook and Conclusion Last

    Once your body paragraphs are fully drafted, you will have a clear picture of the article’s tone, scope, and key takeaways. At this point, writing a compelling introduction and a concise conclusion becomes an effortless task. You can quickly summarize your main points and draft a call to action that aligns perfectly with the content you just created.


    Workflow Comparison: Traditional vs. Accelerated Method

    To understand where your time is actually spent, it is helpful to look at how a structured, accelerated workflow compares to a traditional, unoptimized approach.

    Workflow Stage Traditional Approach Accelerated Approach Practical Impact
    Topic Selection Brainstorming on the spot; staring at a blank page. Selecting a pre-validated topic from a rolling idea bank. Eliminates initial procrastination and decision fatigue.
    Preparation Writing immediately with no outline; researching while writing. Building a detailed outline with H2/H3 subheadings first. Prevents getting lost in research rabbit holes or losing track of the main point.
    Drafting Phase Writing, editing, and correcting grammar concurrently. Continuous drafting without pausing; ignoring typos. Encourages flow state and drastically increases output speed.
    Structuring Writing the introduction first and struggling with the hook. Writing the body first; crafting the introduction and conclusion last. Avoids introductory blockages and ensures a highly cohesive article.
    Formatting & Editing Editing paragraph by paragraph during drafting. Batching all proofreading, formatting, and link placement at the end. Ensures professional polish without disrupting creative momentum.

    Practical Strategies to Boost Daily Writing Output

    Once you have restructured your workflow, you can implement specific daily strategies to further increase your typing and composition speed.

    Use Focus Sprints and Time-Blocking

    Multitasking is a massive productivity killer. When you have email notifications popping up, social media tabs open, or your phone vibrating next to you, your focus is fragmented. Use time-blocking to dedicate specific, uninterrupted windows to your writing.

    Try working in focused sprints, such as 25-minute blocks of intense, distraction-free writing, followed by a short break. During these sprints, close all unrelated browser tabs, silence your phone, and focus entirely on putting words on the page.

    A person is intensely focused on typing at a desk, surrounded by a clear bubble that blocks out blurred distractions, with a timer nearby.
    A person is intensely focused on typing at a desk, surrounded by a clear bubble that blocks out blurred distractions, with a timer nearby.

    Utilize Frameworks and Templates

    Most blog posts fall into a few common structural formats: listicles, how-to guides, comparison articles, or product reviews. Instead of reinventing the wheel every time you start a new piece, create standard structural templates for these formats.

    For instance, a standard how-to guide template might look like this:

    • Hook: Identify the user’s problem.
    • Promise: Explain how this guide will solve it.
    • Step-by-Step Breakdown: Logical, chronological subheadings.
    • Common Mistakes: What to avoid.
    • Conclusion: A clear call to action.

    Having these structures ready allows you to instantly plug in your research and focus solely on the writing.

    Leverage Dictation and Voice Typing

    Most people speak significantly faster than they type. If you find yourself struggling to keep up with your thoughts, try using speech-to-text dictation tools. You can speak naturally to draft your paragraphs, then go back during the editing phase to clean up the formatting, punctuation, and grammar. This approach is highly effective for capturing a conversational, natural tone.

    A person speaks into a modern microphone, and words instantly appear on a digital screen, illustrating the speed of dictation.
    A person speaks into a modern microphone, and words instantly appear on a digital screen, illustrating the speed of dictation.

    Leveraging Technology to Streamline Publishing

    Speeding up your writing process is not just about the actual writing; it also involves streamlining the post-draft activities like formatting, styling, and publishing. Many content creators waste hours importing drafts into their content management systems, manually styling headers, and wrestling with image placements.

    Using specialized writing tools and platforms can dramatically ease this transition. For example, utilizing advanced blogging ecosystems like wp-publisher.com helps creators bridge the gap between drafting and live publishing. By utilizing the writing dashboard in the specialized App, you can manage your formatting and media assets in a unified space, avoiding the clunky, repetitive copy-pasting that slows down traditional workflows.

    To understand how optimization fits into a broader publishing strategy, visiting our About page can provide deeper insights into our team's commitment to clean, efficient publishing design. Organizing your tech stack properly ensures that once your draft is complete, pushing it live takes minutes rather than hours.


    Overcoming Common Bottlenecks in Speed Writing

    Even with the best systems in place, certain hurdles can still slow you down. Knowing how to navigate these roadblocks is key to keeping your momentum.

    • The Research Trap: It is incredibly easy to get sidetracked by endless research. To avoid this, set a hard time limit for your research phase before you start writing. If you realize you need a specific statistic or quote while drafting, do not stop to search for it. Simply write a placeholder like [Insert statistic about conversion rates here] and keep writing. You can find and insert those specific details during your editing pass.
    • Perfectionism: Remember that a published, helpful article is infinitely better than a perfect draft that never leaves your computer. Your goal is to provide clear value to your reader. Minor stylistic imperfections will not ruin your content, but failing to publish certainly will.
    • Overcomplicating the Vocabulary: Write the way you speak. You do not need to use complex jargon or overly formal language to sound authoritative. Conversational, clear, and direct language is much easier to read, highly engaging for your audience, and significantly faster to write.

    Related reading